Featured

Water Damage Facts

<p class="has-drop-cap" value="<amp-fit-text layout="fixed-height" min-font-size="6" max-font-size="72" height="80">Everyone's worst nightmare is waking up to hear water dripping (or rushing) out of somewhere it shouldn't be. The average home insurance claim costs aroung $10,000 and the insurance payout for water damage in 2017 was $13 billion.Everyone’s worst nightmare is waking up to hear water dripping (or rushing) out of somewhere it shouldn’t be. The average home insurance claim costs aroung $10,000 and the insurance payout for water damage in 2017 was $13 billion.

Water damage claims costing over $500,000 have doubled since 2015. Non-weather water damage claims are the second most common type of homeowner insurance claim, behind wind damage.

Water from flood damage can affect any property, regardless of age. New homes are just as likely to experience water damage issues as older homes. They are built with lower quality materials and quite often have poor quality workmanship in plumbing. Older homes tend to cost less to repair, as well.

The top causes of water damage in the home:

  • Appliance leaks or failure
  • Sewer backup or clog
  • Water overflow & buildup
  • Plumbing, leaking or burst pipes

There are three categories of water damage, the first two being the most common.

  1. Category 1, aka white water, is from a hygenic source, like a water supply line, rain or melted snow.
  2. Category 2, aka grey water, has been exposed to contaminants, like bath/shower water or appliance discharge.
  3. Category 3, aka black water, is contaminated and may come from contaminated sources like toilets, sewers or natural body of water overflows.

Within 48 hours or less, clean or grey water can deteriorate to black water, and areas that experience clean water intrusion can quickly become toxic. Black water and contaminated materials have to be removed, or the result can be airborne contamination even after being dried. Most porous and absorbent materials contaminated by black water are unsalvageable. There are many safety considerations to drying a house that has had a black water flooding event, and a certified professional company should always be called to handle those jobs.

The level of water intrusion in a water damage event is measured by the amount of water, materials affected and level of absorption. There are four classes with Class 1 being the least dangerous and Class 4 the worst.

  1. Class 1 – Small water flow to area and materials are low porosity (i.e., tile floor). Once bulk of water has been removed, very little moisture remains, and minimal drying is needed. Can deteriorate to Class 2 or 3.
  2. Class 2 – Significant amount of water that has soaked into carpet, drywall or other porous materials. Can deteriorate to Class 3.
  3. Class 3 – Highest amount of water and absorption by surrounding porous materials. Greatest level of removal and drying involved with the wet area and structural surfaces.
  4. Class 4 – Most of the moisture is trapped within the building materials with extremely low chance of evaporation after bulk water removal. May require special drying methods, longer drying time and/or structural disassembly.

Water moves quickly and has potential to cause major damage. So, it’s important to move quickly to stop the water flow at its source and begin removing sitting water. The longer water sits after a flood or water damage, the more damage it will cause and more likely become contaminated.

Minutes: Water will move along path of least resistance and be absorbed by anything in its way and begin to cause stains.

Hours: Furniture in contact with water will swell, distort and weaken. Non-colorfast dyes in fabrics that have been soaked will begin to bleed and damage whatever is in contact.

24 Hours: Condition of furniture, building materials and cabinetry will continue to deteriorate. Humidity will begin to cause strong odors.

Days: Building materials (i.e., wooden floors, drywall, framing) will be warped and unsalvageable and paint/wallpaper will blister and peel. Fungi and mold will be visible and musty odors present.

Weeks: Organic materials will be infested with mold and the building may have to be taken down to the studs. Home may be hazardous to health due to microbial growth.

Months: Home may become total loss, due to cost of repairs being too high, insurance denies claims due to neglect or homeowner may be dropped from their policy.

It can take up to 18-24 months for the intire water damage claim process – insurance claims and repairs to be completed. It can be frustrating and time consuming, so understanding your homeowner’s policy in advance, in relation to water events, can help smooth the process.

To read the original article click here.

Featured

Signs of Mold in Your Home

Woman in orange top sitting on with couch, covered by orane blanket, wiping her nose with a tissue.
<p class="has-drop-cap" value="<amp-fit-text layout="fixed-height" min-font-size="6" max-font-size="72" height="80">The existance of mold is unavoidable and is not a bad thing in and of itself. However, when mold blooms in your home, its mere existance can be life altering. Mold can grow anywhere there is enough moisture, like the obvious bathroom or kitchen, but also inside of walls and other dark places where unseen moisture can go undetected. Those dark crevices provide ample mosture and food to allow mold to grow and cause damage to your home and health before you even know you have a problem. There are signs to be aware of that can clue you in to microbial growth before it can have a catastrophic effect of the structural integrity of your homr or your family's health.The existance of mold is unavoidable and is not a bad thing in and of itself. However, when mold blooms in your home, its mere existance can be life altering. Mold can grow anywhere there is enough moisture, like the obvious bathroom or kitchen, but also inside of walls and other dark places where unseen moisture can go undetected. Those dark crevices provide ample mosture and food to allow mold to grow and cause damage to your home and health before you even know you have a problem. There are signs to be aware of that can clue you in to microbial growth before it can have a catastrophic effect of the structural integrity of your homr or your family’s health.

What are the signs?

  • Be aware of visible changes in your home. At the first notice of mildew of mold, clean it. Small patches of growth can easily be cleaned and treated regularly to avoid regrowth. Make a habit of checking and cleaning the obvious spots, like the kitchen, bathroom, basement and even the attic. If you see it, clean it, don’t ignore it.
  • Control the humidity inside your home. This plays a huge part in limiting mold growth in your home. When showering or cooking, run your exhaust fans (make sure they are vented to the outside, not the attic) or open windows to increase ventilation. Keep the termperature level throughout your home all year long to avoid causing excess condensation.
  • Fix leaks as soon as you notice them and investigate for damage they may have caused before they were found. Any way you can control leaks or added moisture from hanging around in your home the better. Watch for stains on walls, ceilings, floors or anywhere new or unusual discoloration begins to form. These are visual cues that you may have a leak somewhere, so take action immediately.
  • Pay attention to your allergies. If you suffer from seasonal allergies, but are noticing sympotoms out of season, this could be a sign of a mold problem. Listen to your body when it is experiencing unusual reactions, it could be a sign of mold in your home. Typical symptoms may include:
    • Itchy, watery eyes
    • Itchy skin or rashes
    • Congestion
    • Exisitng asthma may be aggravated
    • Fatigue
  • The nose knows! If you begin to smell must odors, that is a sign that something may be amiss your home. Dont ignore it, investigate! Dampness has a scent as well, so pay attention to areas that give off that smell and make sure it is well ventilated.
  • Rust is a sing of excess moisture, so make sure you get the rooms where you notice rust dried out and well ventilated. It’s not necessarily a sign of mold, but it does show that the room may need addtional help with drying out.
  • Open your windows occasionally, just to air out your home. Run your AC, run your ceiling fan or stand alone fans. Whatever you can do to promote air circulation and venetilation in your home will help reduce moisture and mold growth.

Making these steps part of your routine home maintenance can go a long way to preventing microbila growth in your home. It doesn’t take huge, life altering steps to avoid mold growth, but mold growth can make life altering changes to your home and life. A little awareness and proactive steps can save your home and health down the line.

Featured

Water Damage Cleanup Tips

When you experience water damage, the water can wreak havoc on the structure of your home, your personal belongings and the health of the inside environment. Depending on the type of water event you experience, the water may be highly contaminated. With just an inch of water, high dollar items can be ruined, like carpet, wood flooring and furniture. Even small amounts of moisture create a perfect breeding ground for mold, which can ruin the structural integrity of your home and its contents, as well as lead to poor indoor air quality which can contribute to many health realted issues. Preventing a water event from escalating to mold growth is the key to keeping your home’s air clean and healthy.

The following are steps you should take when you experience a water event in your home, whether it’s a sudden pipe burst or weather related.

Ensure the safety of the area – Before entering an area with water damage, survey the area for danger from a power source. If necessary, turn the power to the area off at the breaker box. If it is obvious where the water is coming from, turn off the water at it’s source or the water main, if necessary.

Get rid of the water – There are several ways to begin removing the standing water, but however you do it, do it quickly. If you don’t have power to the area, or are worried about getting shocked, the old-fashioned, manual method way will work. Use old towels, buckets and mops to soak up as much water as possible. You can pour the water down the drain or on your lawn. A wet/dry vacuum can be used too, just be careful to plug it in an outlet away from the water. Don’t use an extension cord, as the connection could also short out and give you a nasty shock. Remember, water and electricity don’t mix!

Dry out affected area – Once you’ve removed all the water, use fans and a dehumidifier to help dry out the area. It is helpful to open windows to allow for air circulation and faster drying. It is important to dry out the area as quickly as possible.

Disinfect – After the area has dried out, including any structural items (insulation, drywall…) use a good disinfectant to get rid of any bacteria that might have been in the water or beginning to grow. Gloves Off Disinfectant is a non-toxic but powerful disinfectant. Disinfect all areas affected by water, including walls, wood and non-unholstered furniture. If you experience problems or know you will need further assistance, don’t hesistate to contact a professional, particularly if it is the water event was caused by toilet or sewage backup. They will have the equipment and knowledge to get the cleanup done right.

Featured

Why You Should Always Hire a Mold Removal Professional

Image of shower floor and walls that have mold growth.

Mold is not something to mess around with. Lurking in dark spaces, destroying your hard-earned property – it’s a serious problem. Mold will often go undetected and unseen. This fungal destroyer can be found in bathrooms, underneath tile, in laundry rooms and even the kitchen. Whether you smell it, spot it, or just know it’s there, here’s why you need to hire a mold removal professional.

Mold spreads fast. Even a little bit of mold is bad news. If the area is wet and dark, the mold will flourish. Once this happens, it’s only a matter of time before the well being of your home deteriorates. The earlier you call, the easier the restoration.

Mold makes allergy symptoms even worse. If you have itchy eyes, a runny nose, sore throat and fatigue, you may think that your seasonal allergies are back. In some cases though, it could be mold. Once mold is growing, it spreads quickly. The tiny spores can be easily blown around your home, exacerbating your allergies. Calling a mold professional is the easiest way to restore your health and get rid of the problem.

You may not have the professional equipment. Mold is difficult to kill completely. Restoration companies have the equipment needed to eliminate mold from walls, wood, closets, clothes and any other place it may be hiding. With their professional tools, there is little risk of damaging your belongings.

Professional restoration companies know how to detect all molds. Don’t try to DIY when it comes to mold removal. Professional removal services can detect all visible, dormant and hidden molds. Then, using proven techniques, they kill the mold, preventing regrowth.

Source: Frequently Asked Questions About Mold Removal – Blog Q&A – TSC Restoration

Featured

Signs of Hidden Water Leaks in Your Bathroom

You may need to poke around to find the not-so-obvious bathroom plumbing leak. If left untreated, though , a water leak in your bathroom can cost you, especially if it leads to serious water damage to walls, flooring and paint. Look for these somewhat subtle signs to determine whether you need to hire a plumber to fix those leaking pipes or plumbing fixtures before things get worse.

Mildew or Mold

No matter how well and how often you clean your bathroom, mold or mildew can spring up if you have a hidden water leak. Mold thrives on moist, dark areas, and a pipe, which is typically hidden in a wall or under flooring, provides the perfect starting point for mold or mildew if the pipe springs a leak.

While it’s normal for a little mildew to occur wherever water accumulates, such as in the corner of a shower, mold or mildew on shower walls or in corners of the bathroom is a clear sign that water is leaking somewhere and finding its way to those areas. A leaking pipe provides plenty of moisture, so the longer it takes to detect and fix the leak, the easier and faster mold will grow.

Damaged paint or wallpaper

A wall with blistering paint or wallpaper is another sign of bathroom leaks. In most cases, steam from the occasional hot shower shouldn’t cause paint or wallpaper to come loose. When water and moisture get between the wall and paint, they eliminate the hold and begin to separate the two, causing the paint to rise from the wall and fall of in pieces. The same goes for wallpaper; the adhesive used to bond the paper to the wall becomes less sticky and the paper begins to come loose.

Damaged walls

A wall that is warped or stained for no reason is a clear sign that you have a plumbing leak in your bathroom. When drywall is exposed to moisture, it becomes soft and begins to bubble, ultimately warping and breaking into pieces. If the leak reaches the ceiling, it causes it to sag and possibly leak some of the water that has accumulated. To fix the leak, a plumber often must tear out the drywall, requiring someone to patch and paint when the plumber is finished.

Damaged flooring

Unless you purposely let water sit on it, a bathroom floor rarely suffers water damage unless there is a leak. If your bathroom floor is buckling, cracking or beginning to stain for no obvious reason, chances are hidden water is the culprit. The water could be from a pipe directly underneath the floor, or it could have traveled there from another area.

Depending on the type of flooring in your bathroom, moisture can make it feel spongy or soft. Tile may lose its adhesion and become loose, allowing you to easily remove a piece and possibly expose water or moisture underneath it. You will also often find a damp subfloor.

Stains on ceilings

If you have a bathroom on a second floor, you might spot a leak in the ceiling under the bathroom. Check the patch of ceiling in the room directly beneath the bathroom for stains and signs of water damage. However, because water can travel a long distance, it’s possible to find water stains on the ceiling farther away.

An occasional wet floor in a second-story bathroom won’t cause enough seepage to damage anything underneath it. Any brown, copper or dark stain on the ceiling is a sign of a pernicious water leak in the ceiling. A sagging ceiling is a sign that water from a leak is reaching the area.

Source: Signs of a Hidden Water Leak in Your Bathroom – J.T. Gonzalez – Blog – Angie’s List

Featured

How to Save Water at Home

A dripping faucet or a pipe with a slow leak may seem harmless, but even small amounts of wasted water can quickly become expensive problems. Save yourself money and headaches by learning how to stop water leaks – and possible damage – before the start.

Photo by Sora Shimazaki on Pexels.com

It flows from faucets, fills washing machines, collects in gutters and runs down drains. When it’s unseen or unwelcome, however, water can turn disastrous. Leaks in American homes waste more than 1 trillion gallons of water annually. Your home may seem water-tight, but there’s a 1 in 10 chance it hides a leak that spews 90 gallons or more every day. That’s like throwing at least $50 per year down the drain. A small leak left unchecked can turn into a pool that causes serious problems.

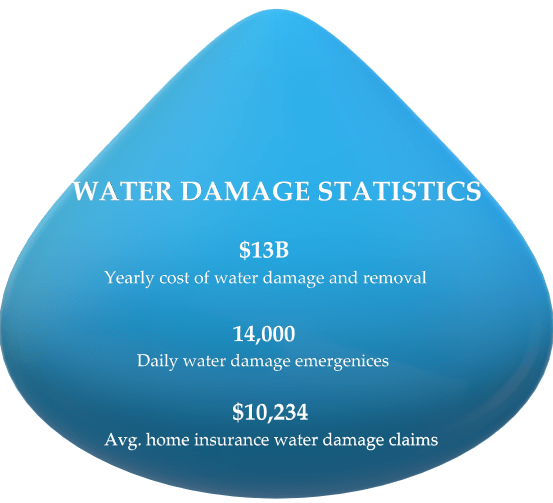
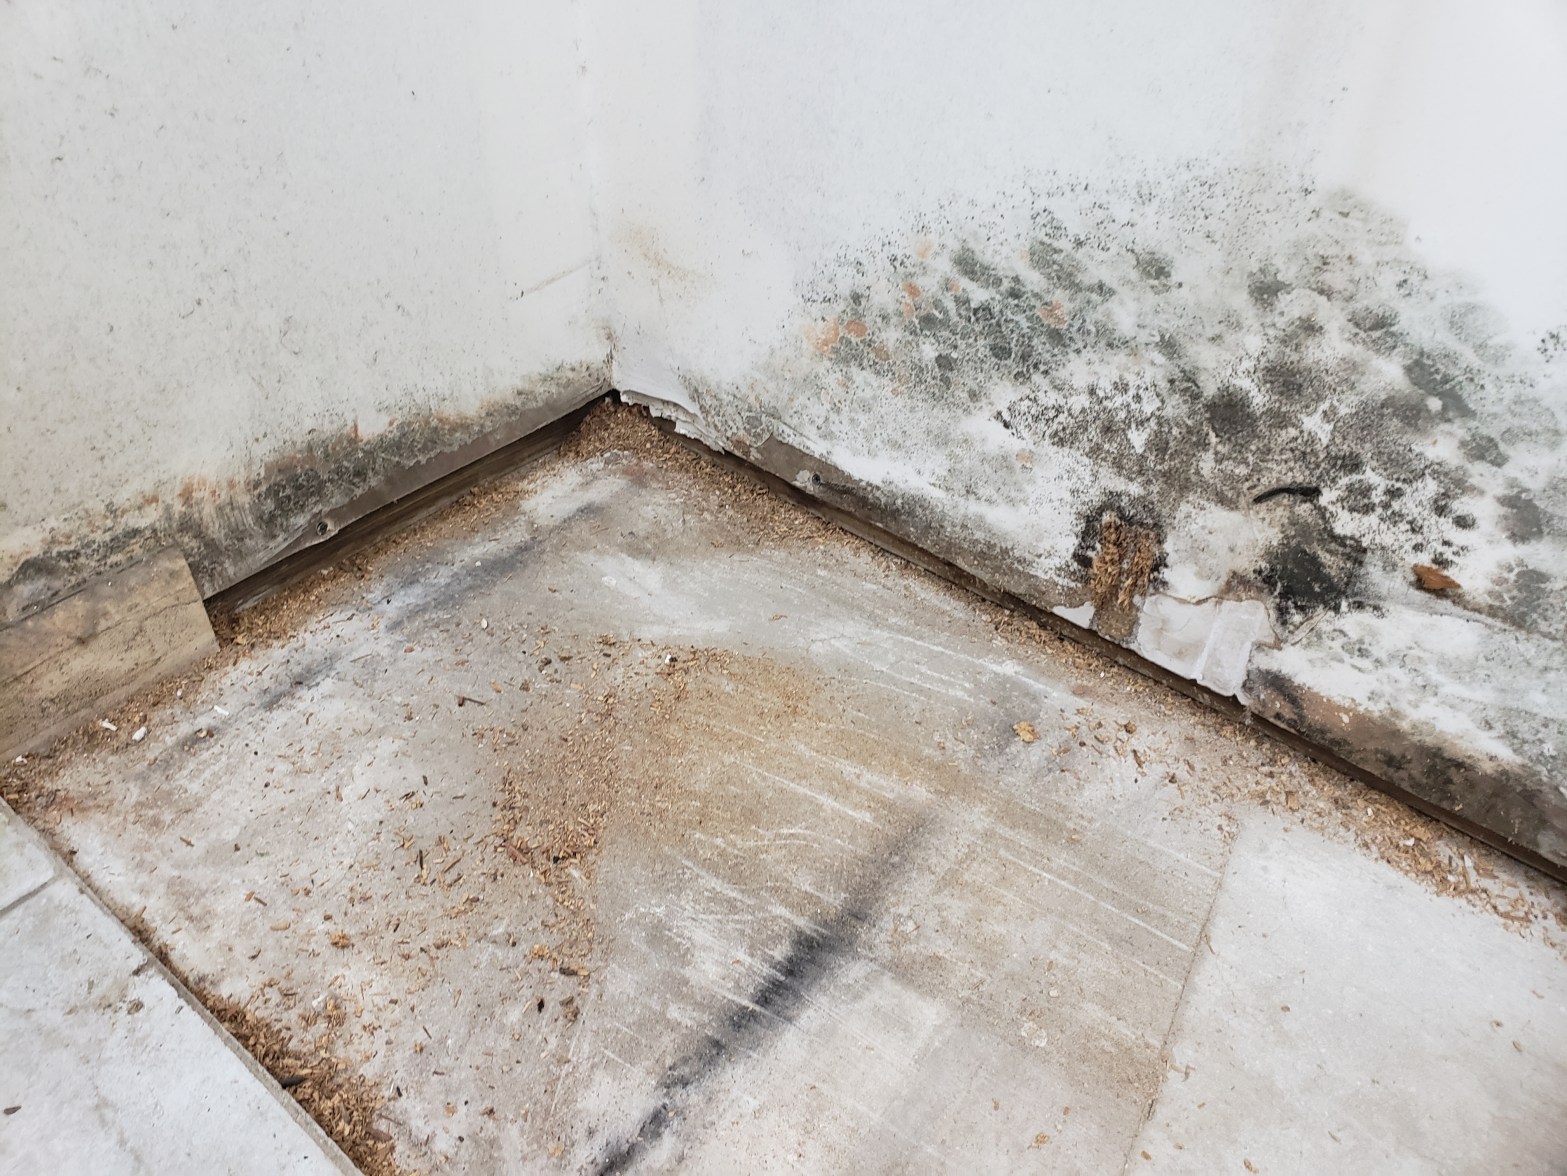
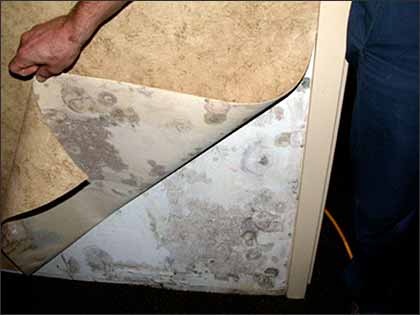
According to State Farm records, the average cost of a water damage claim in 2015 was $11,013, and that price tag can skyrocket when the home also experiences structural damage. Undetected water can also pose a health risk by encouraging the growth of mold, mildew and bacteria. Hiding behind walls, it can exacerbate allergies or asthma and cause respiratory problems in your family members.

Luckily, it’s easy to correct most common sources of water seepage. Quickly replacing a worn toilet flapper or fixing a dripping faucet, for example, can save you about 10% on your water bill and could help prevent more serious problems. Here are some ways to limit wasted water and help ensure your home is ship shape.

Pipe Dream

Indoor plumbing is one of civilization’s greatest innovations, but it’s not flawless. The pipes that deliver water are common sources of leaks. The risk increases with age because pipework joints can degrade with time. Homes older than 30 years are three times more likely than new homes to have plumbing problems. Common causes of leaky pipes are:

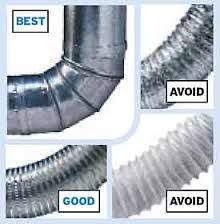
  • Rust or corrosion of galvanized steel pipes or of the metal joints and connections of newer PVC or copper piping.
  • Too much water pressure; fixtures and appliance hoses can withstand only so much before faltering.
  • Cracked or broken pipes and hoses, which can happen with age, pressure or freezing.

To avoid these problems, replace galvanized pipes with plastic, if possible, and hire a plumber every few years to inspect your pipes for rust. If your home has a water pressure regulator, adjust it or hire a plumber to address pressure problems. Finally, insulate exposed pipes and those in the attic and basement. Once a pipe springs a leak, it’s best to have a professional repair it. One tell tale sign of a leak is decreased or inconsistent water pressure, if you notice such problems with your faucets, call a plumber.

Play Detective

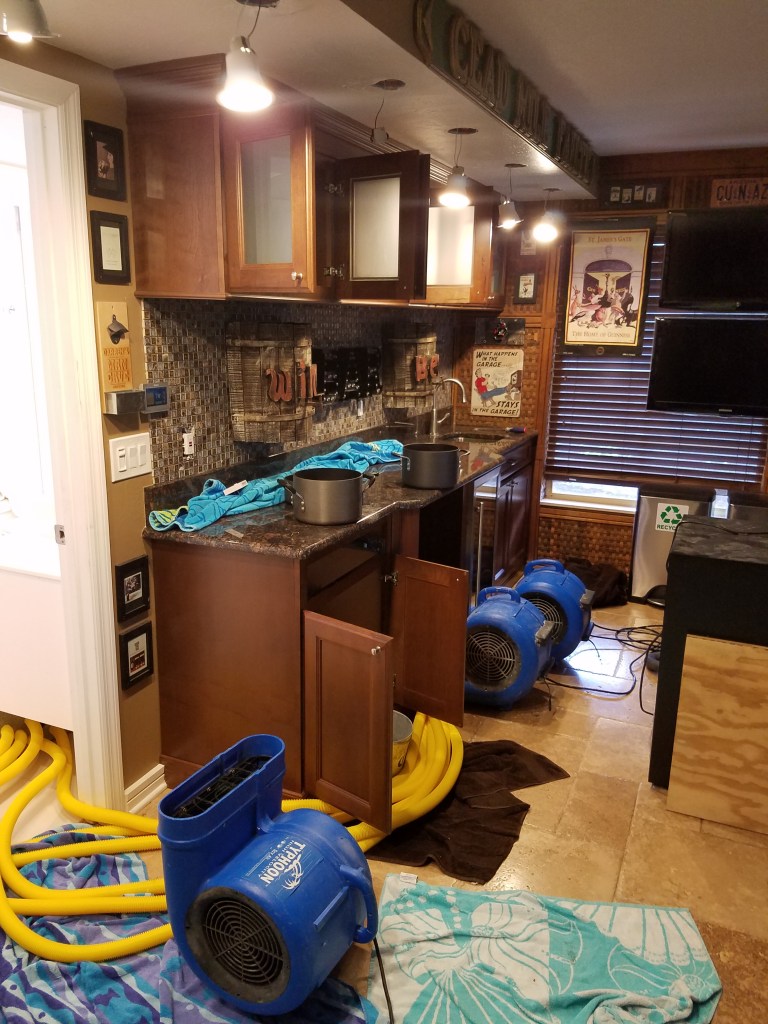
When you picture water damage, you may imagine a flooded basement or a waterfall pouring from a toilet. But most problems don’t start with giant splashes; more common is a slow leak that goes unnoticed until the damage is done. Early intervention is key. Waiting too long inflates your utility bill and allows water to build to a destructive point that can result in costly restoration expenses. How do you know if your home hides water leaks?

  • Check your water bill: Review usage amounts during the coldest months. A household of four using more than 12,000 gallons per month probably has some serious leaks.
  • Call your water company: Ask whether your utility provider has a leak detection program that alerts homeowners of unusually high water usage. If so, find out how the system works, so you can take appropriate action.
  • Conduct a meter check: Record your water meter reading; then turn off all water inside and outside your home. Make sure no one uses anything that requires water for two hours. Record the reading again; if it’s up, it’s likely a leak. These procedures can help identify the presence of leaks, but they don’t tell you their locations. That requires further investigation, start by examining the most common culprits – pipes, appliances, toilets, faucets and the home’s exterior.

On Alert

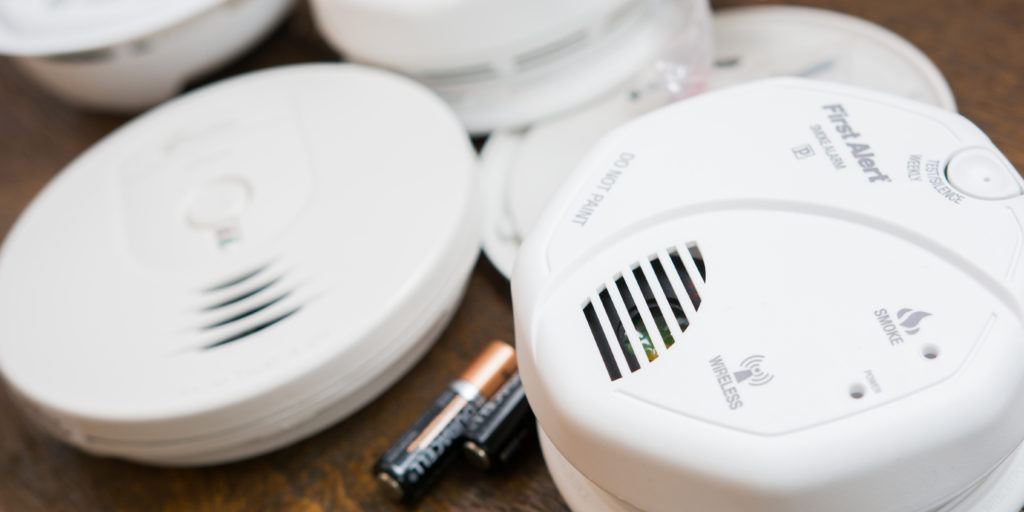
As Ben Franklin said, “An ounce of prevention is worth a pound of cure.” Help protect your home from water damage by using water leak alarms in several strategic locations. These sensors can detect water in hard-to-see areas. An alarm sounds for as little as one-sixteenth of an inch of water. Basic models, for about $35, connect to smart home systems, such as Iris, Wink and SmartThings. Use the alarms under or near toilets, sinks, refrigerators with icemakers, dishwashers, washing machines, water heaters, sump pump pits, whole house humidifiers, window AC units and any areas that have leaked previously.

Rise of the Machines

Many appliances and mechanical systems use a lot of water. When they have prolems, they can leak and cause costly damage. Routine maintenance can help!

  • Dishwasher: If a hose leaks or bursts, it can quickly flood your kitchen with gallons of water. The problem is most common with rubber hoses; $20 replaces these with sturdier, steel braided options.
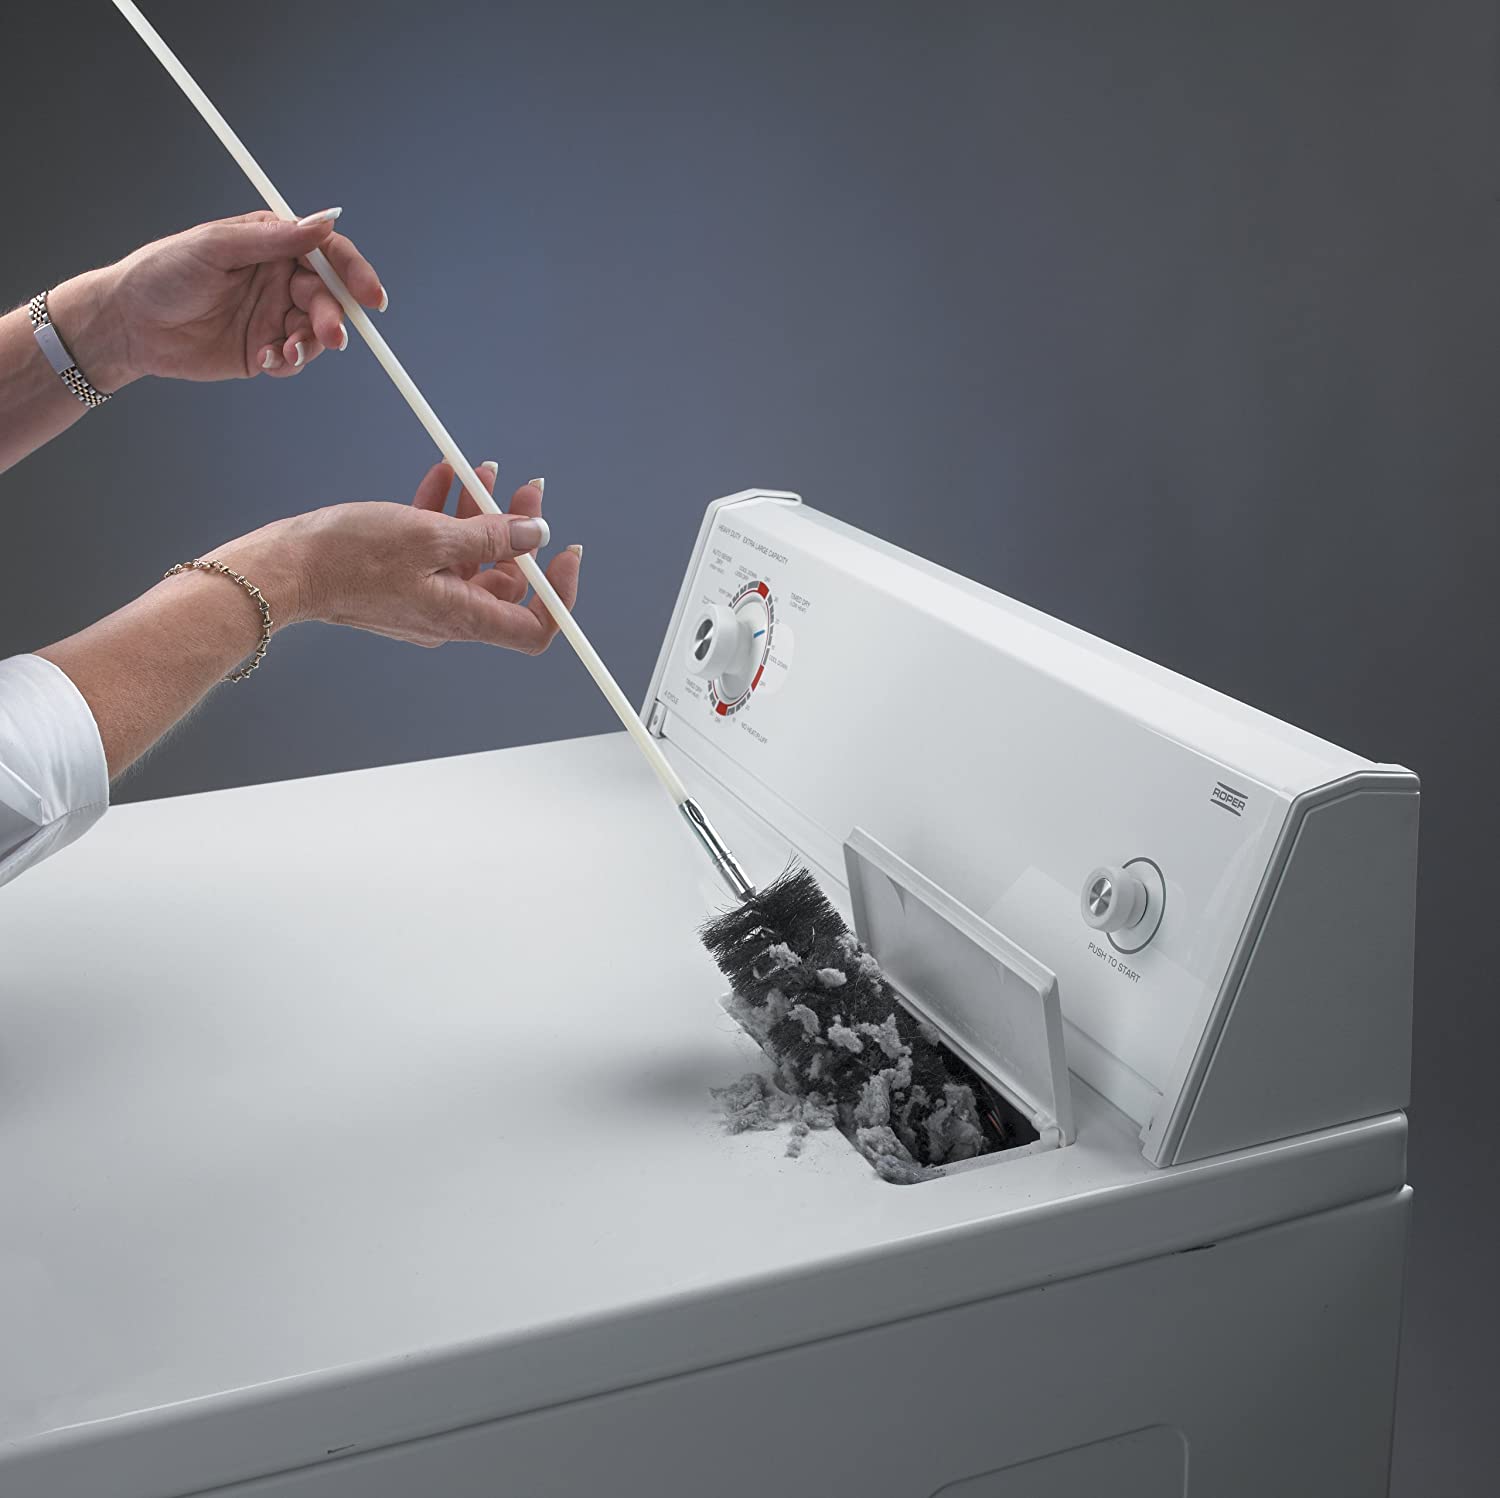
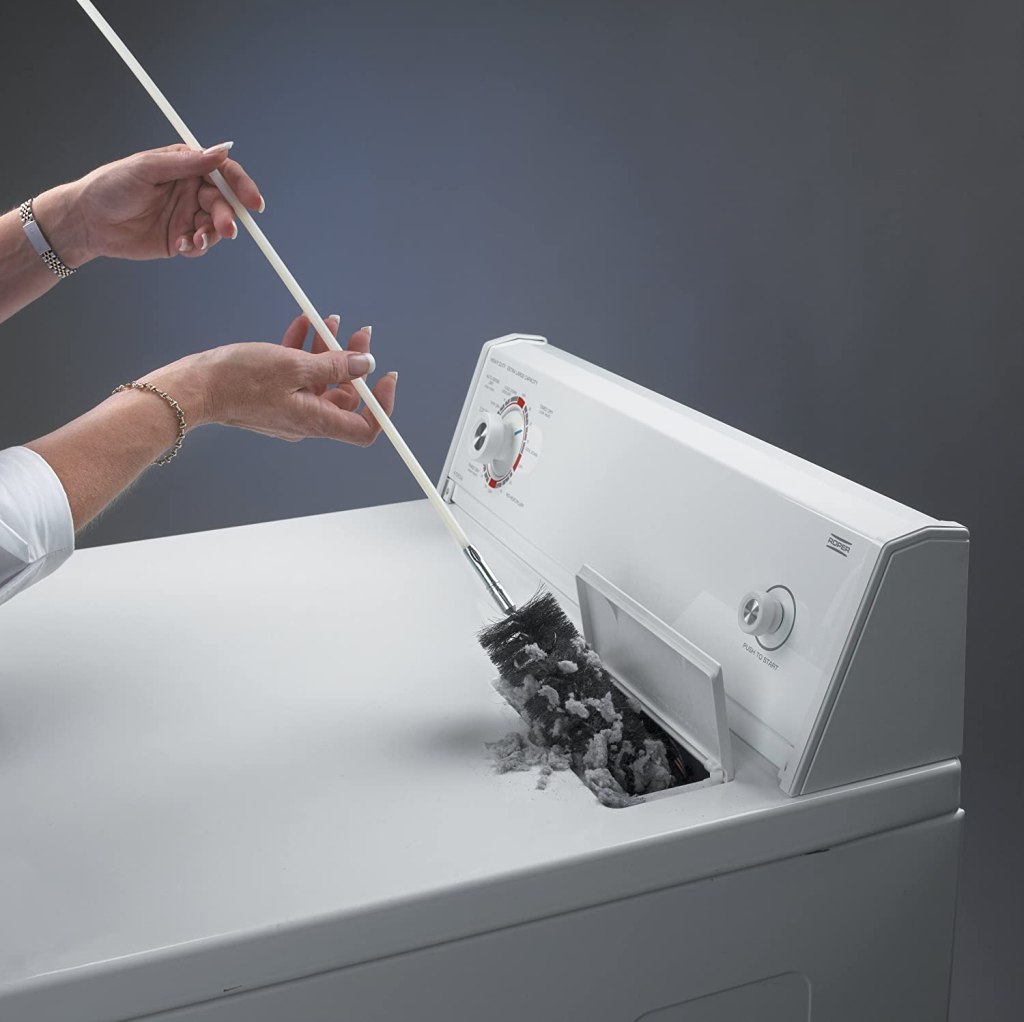
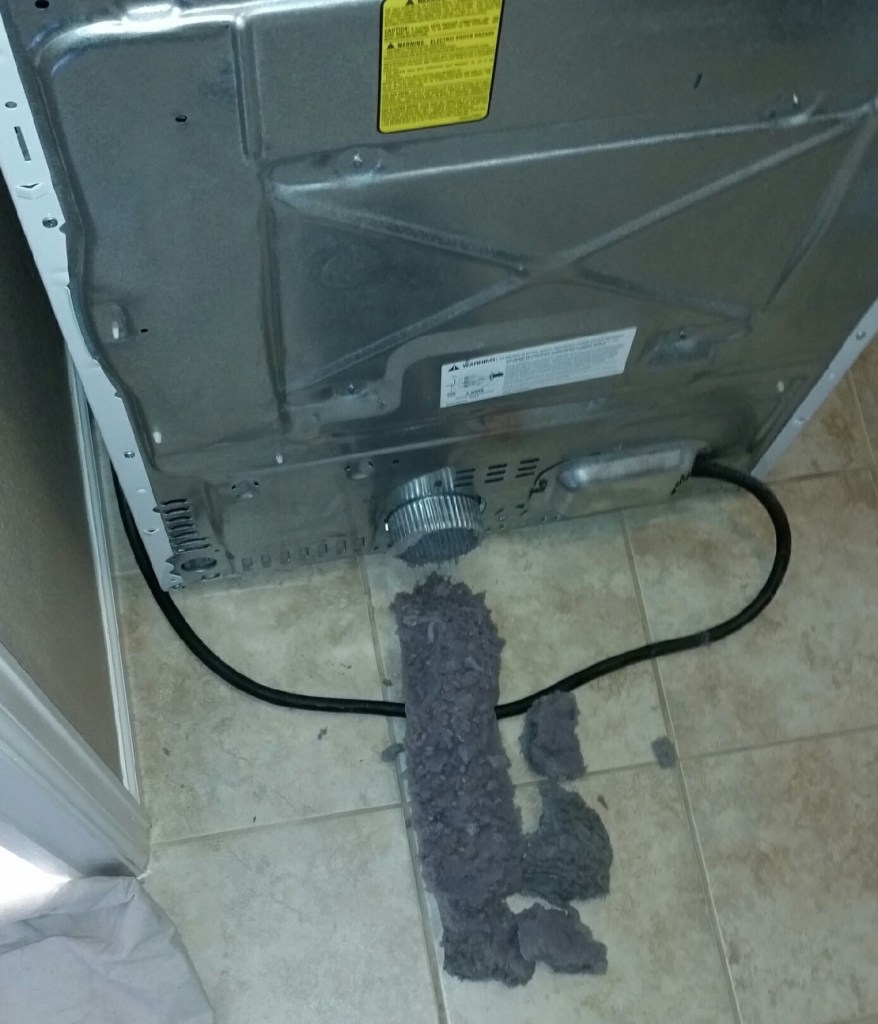
  • Washing machine: Half of leaks result from burst water supply lines, which can loosen with vibration and degrade over time. Check your hoses frequently for cracks and kinks and replace them every three to five years, as part of a proactive maintenance program.
  • Refrigerator: Almost three-fourths of leaks happen because of a failed plastic hose that connects the icemaker to the water line. Check the hose every six months and replace it if it’s discolored or cracked.
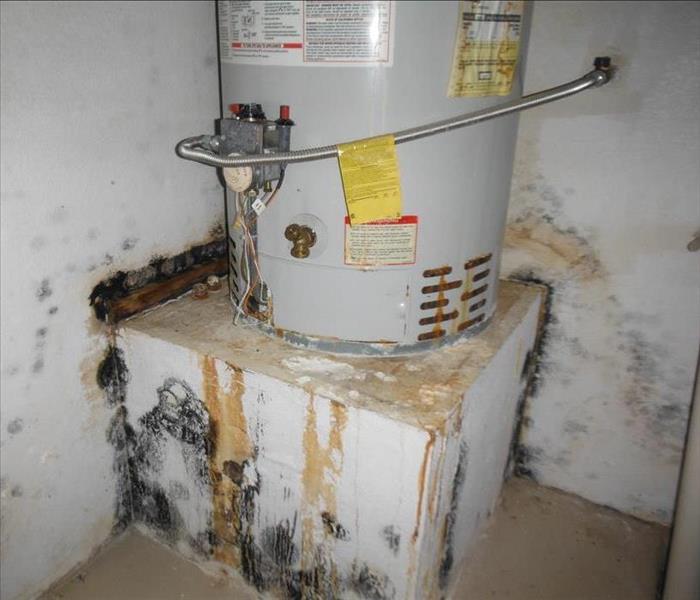
  • Water heater: Three out of four fail before age 12. Protect yours by flushing the tank every six months. Check annually for corrosion, leaks and a bulging tank. Have a professional check the anode rods for rust every two years.
  • Whole house humidifier: If the refill valve in a humidifier fails, water can leak directly into your sewer. Inspect the equipment frequently during the heating season, and turn off its water supply when not in use.

Toilet Troubles

Considering how often we use them, it’s not surprising that toilets are common sources of leaks. In fact, more than a third of all residentail toilets have at least small leaks. Even worse, water damage from toilets averaged $14,891 in homeowner claims, according to State Farm records. Finding most toilet leaks is easy. Ten minutes after flushing, remove the tank cover. If the water level is at the top of the overflow tube, you have a leak.

Another way to check; put several drops of food coloring in the tank. If the color appears in the bowl within 10 minutes, there’s a leak. If the toilet valve makes a semi-regular or constant hissing or gurgling sound, there’s likely a large leak.

Some toilet leaks are easy to fix, while others require skilled professionals. Before hiring help, try replacing the flapper valve. Often a worn or warped rubber flapper with a bad seal is the source of problem. Swapping out this $5 part is so easy, most homeowners can tackle it themselves. If a new flapper valve doesn’t stop the leak, call a plumber. The problem could be a broken part, such as a refill valve or a loose gasket or bolt.

Most issues can be fixed at little expense. If the problem is a cracked tank or bowl however, the only solution is replacing the entire toilet. When replacement is necessary, consider investing in a Water Sense labeled model. This third party certification means the toilet uses 20% less water than the federal standard. For as little as $80, the toilet may save the average family nearly $2400 in water and waste bills over its lifetime.

Faulty Faucets

The drip-drop of a leaky faucet or showerhead is more than a nuisance. Just one drip per second can waste more than 3,000 gallons of water per year. And the average repair bill for water damage from a leaky sink is $7,000, according to State Farm records.

Faucets have many moving parts that can degrade, making leaks commonplace with enough time. There are four basic types of faucets, and each is repaired differently. To stop a slow leak, first replace worn inside fitting (washers, gaskets, O-rings, cartridges and ceramic discs) and make sure they are secured tightly. You can likely find a tutorial online.

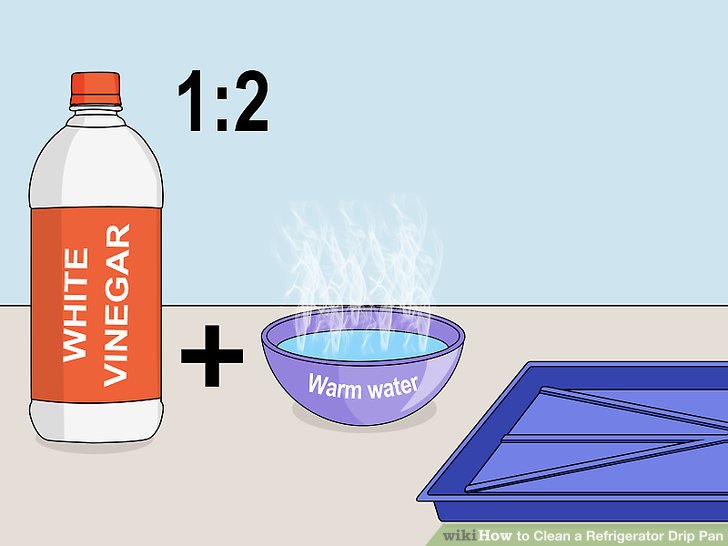
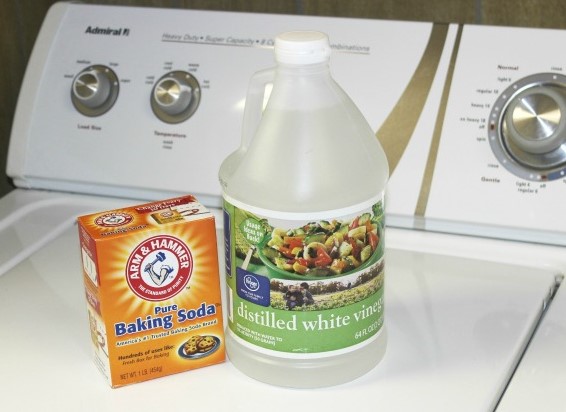
It’s also a good idea to remove mineral buildup in the acerator once a year by taking it out and soaking it in vinegar. If those steps don’t resolve the problem, hire a plumber.

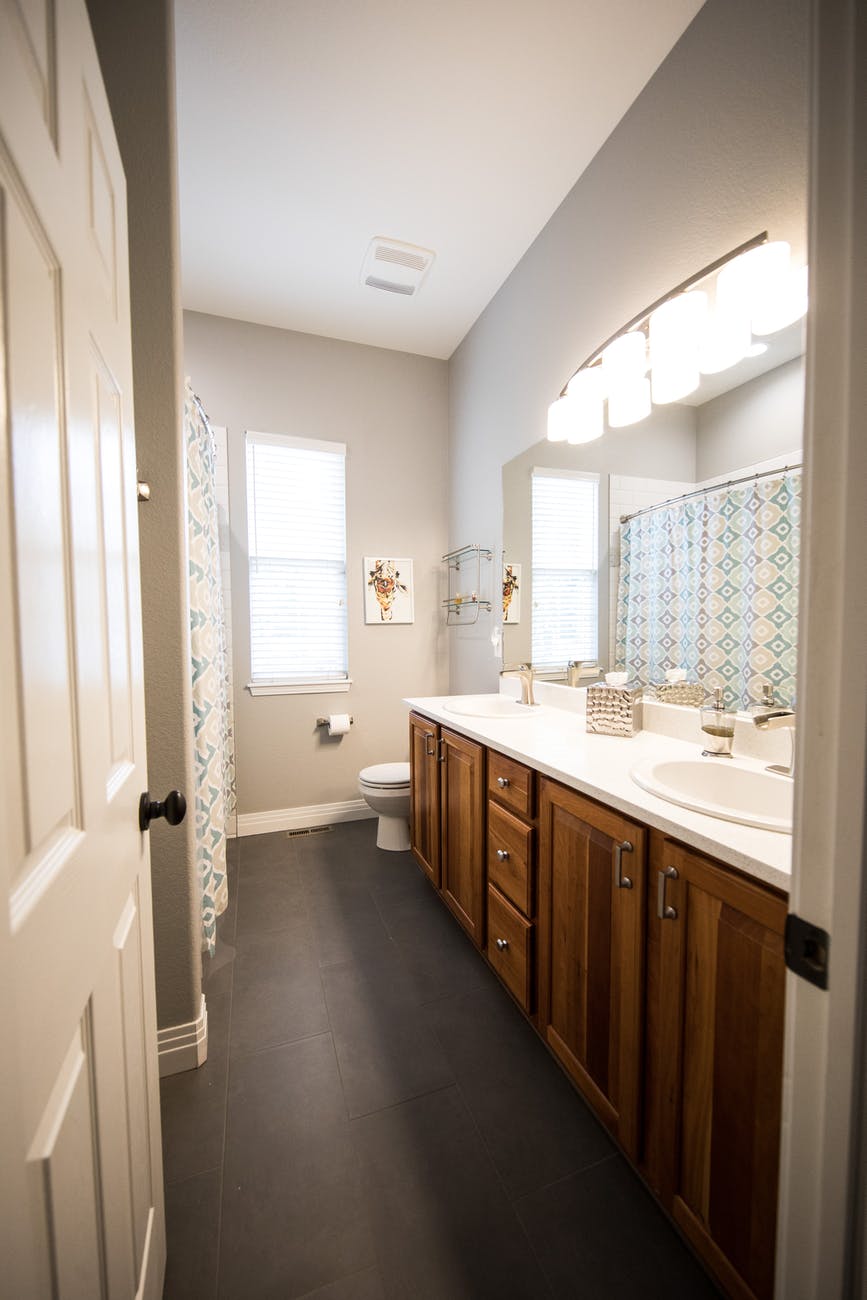
Remember also to inspect faucets in your bathtub or shower, on the water heater, in laundry basins and utility sinks, as well as your home’s exterior.

Shower heads can also cause water issues, but fixing a leak is often as simple as using Teflon tape and a wrench to tighten the connection between the pipe stem and the showerhead. Replacing the washer or O-ring inside the showerhead may also do the trick. As with a faucet, it’s also wise to remove the showerhead annually and soak it in vinegar.

Leaks that aren’t resolved by these tricks may be caused by valves or other parts that a licensed plumber should tackle.

Look Outside

Sometimes water seeping in from outside can cause damage inside. When you search for the source of a leak, walk around you home to examine these possible offenders:

  • Water supply line: If there’s no rain, but you find wet soil where the water line enters your home, there may be a leak in the line that runs between the meter and your home. The water utility should inspect the line and determine responsibility.
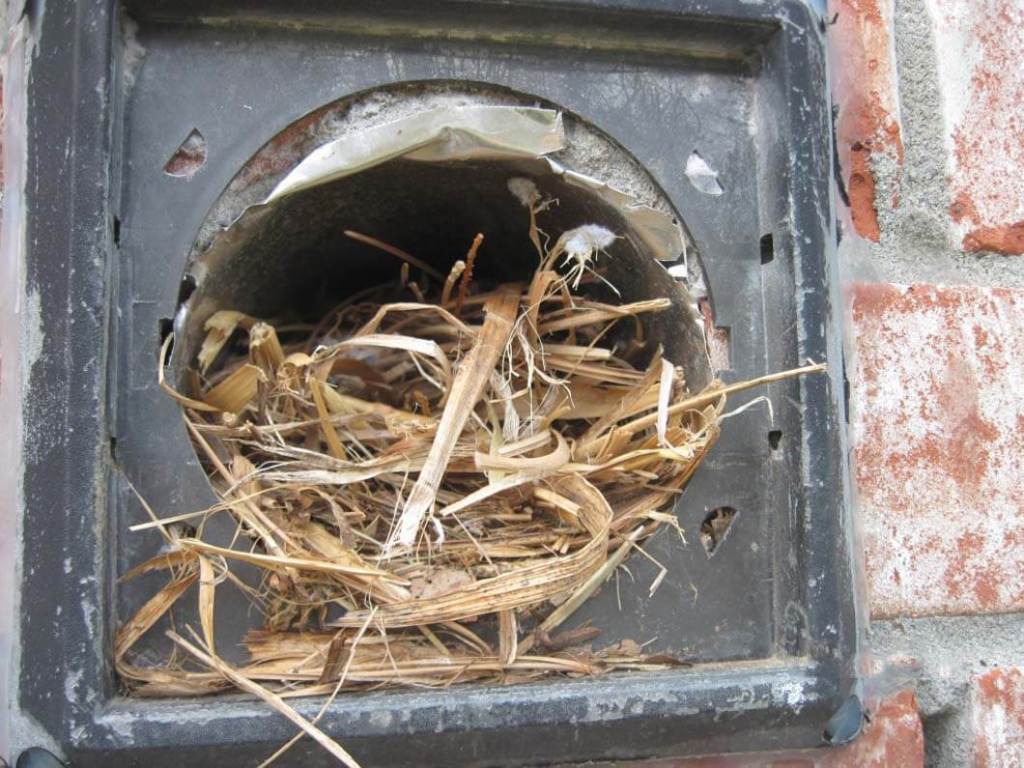
  • Sewer: Tree roots can invade and block drain lines, causing problematic (and smelly) sewer backups. Flush an enzyme drain treatment down the toilet each month in spring and summer. If this doesn’t help, hire a plumber to video-snake the system to look for problems.
  • Foundation: As your home settles, the shifting foundation can cause pipes to detach from each other and create leaks inside your walls. Check your walls frequently, especially those in the basement, and call a plumber if you find wet spots or cracks larger than one-sixteenth of an inch.
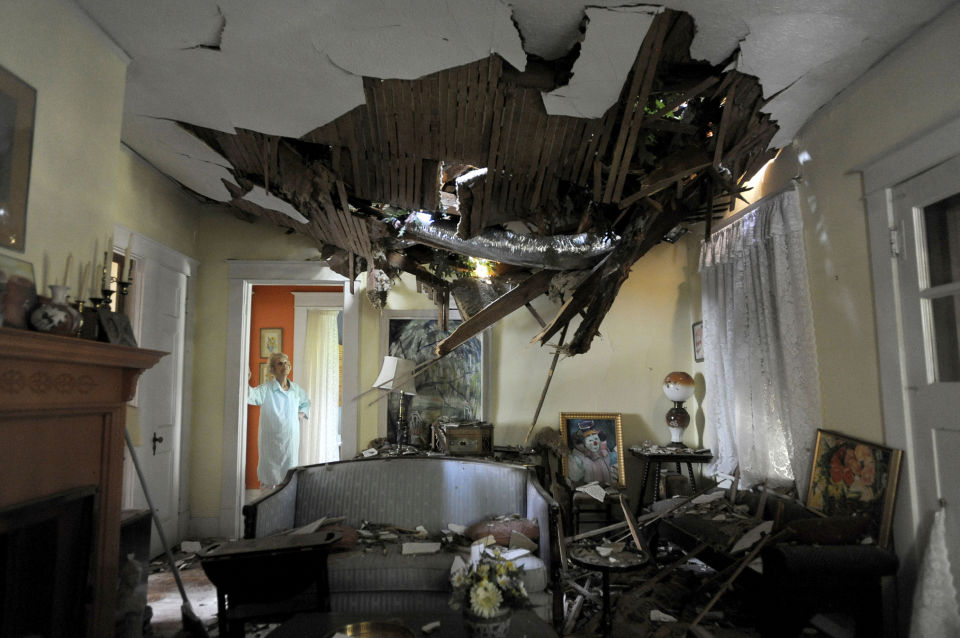
  • Roof: Water stains in the attic or on the ceiling and upper walls may indicate a roof in need of repair. Roof leaks are most common in areas that get frequent hail, freezing temperatures or severe wind. Hire a roofing pro each spring – or after a major storm – to inspect your shingles and make necessary repairs.

How to Save Water at Home – Blog – State Farm

Featured

Controlling Indoor Humidity

Photo by Julia Filirovska on Pexels.com

Controlling the moisture levels in your home is an important factor in creating a healthy indoor air environment. Whether it’s keeping the AC at the right level in the heat of summer or heating your home during the cold months of winter; finding the right balance is key to controlling condensation, which can lead to microbial growth. The recommended humidity level inside the home is between 30 to 40 percent. Dehumidifiers can help in particularly humid climates, but just being aware of the signs can help you adjust you HVAC system to do some of the work for you. Some signs to watch for:

  • Condensation on pipes or windows
  • Visible water leaks/stains (floors, ceilings, walls)
  • Musty odors
  • Rusting metal (shower rods, faucets, pipes)
  • Bowed or buckled wooden structures (flooring, doors, furniture)

Condensation should be dried quickly and monitored. See if adjusting the thermostat takes care of the problem. When moisture encounters the dust and debris that collects on the windowsill, it creates a prime recipe for microbial growth. Also, maintaining the caulk/weather stripping around windows can help alleviate the issue as well. During the cooler months of the year, pipes under sinks and other visible spaces should be monitored for condensation. Keeping them insulated can help when the temperature drops to extremes, along with keeping the air in the home warm enough to dry out the moisture in the air.

Water leaks or stains on walls, floors or ceilings should be investigated and repaired as soon as they are noticed. Again, anytime there is excess moisture, there is the possibility of microbial growth. So, clean up water leaks or puddles immediately.

If you notice a musty odor in your home, have it checked out. Mold is not always visible. There can be leaks inside of walls that may not reveal water damage until there is already extensive microbial growth inside a wall. A mold test can reveal an issue that can be treated or remediated, so don’t ignore those musty smells just because you can’t see or feel moisture.

Rusting metal and warped wood can be a sign that the humidity level is too high in your home. It may be a situation, as in a bathroom or kitchen area, where the exhaust fan needs to be run or a window opened while showering or cooking, to increase ventilation. Exhaust fans should always be vented to the outdoors, not the attic. Proper ventilation in a home helps keep the air flow healthy.

Moisture can also be caused by sources outside the home, so it’s important to inspect the outside of your home for possible water intrusion. Some of these areas can include:

  • Roofing materials
  • Gutters and downspouts
  • Foundation and exterior coverings (siding, mortar, stucco)
  • Crawl space or basement flooring
  • Ground grading, landscaping and sprinkler system

Roofs and fascia should be inspected and maintained year round. Repairing broken roofing materials or damaged or rotting fascia can stop a roof leak before it starts. It is particularly important to check your roof after storm season or before winter season (hurricane/tornado season or areas that experience harsh winters).

Gutters and downspouts should be cleaned several times a year and inspected for leaks or deterioration. Make sure downspouts direct water away from the foundation and do not allow water to puddle excessively.

Inspect the foundation and exterior of your home yearly to look for cracks or damage that could allow water intrusion. Do the repairs yourself or have them professionally corrected to avoid more expensive repairs after further damage is incurred. Foundation cracks may need professional inspection, so note the growth or expansion of cracks year to year.

Ensure your crawl space or basement has adequate ventilation to the outside. Also, put a vapor barrier of some type over dirt floors. Floor drains or sump pumps should be installed as necessary, to ensure proper drainage.

Maintain the landscaping around your foundation to ensure that is doesn’t encourage water to puddle. Having a professional check the grading around the foundation to ensure it is directed away from and allows proper water-shed is crucial. The same can be said for your sprinkler system; check to make sure it is not overwatering areas near the foundation of your home.

These items may seem overwhelming, but if you check each area once or twice a year, it can go a long way to ensuring that you can control possible excess moisture from entering your home. Maintaining a comfortable temperature inside your home all year long (not allowing drastic temperature changes) can help alleviate moisture issues.

Featured

Preventing Home Heating Fires

Burning space heater

If you live in Florida, you know that we do not get to experience the change of seasons like most of the US does. However, we do get hit with cold fronts this time of year. One day we are enjoying a nice day on the beach and the next we are experienceing freezing temperatures that were brought in with a cold front. With the temperatures dropping all over Florida, we are all looking for a way to stay warm. Many people reach for their space heaters on a cold night but are unaware of the dangers and risks they pose.

January is the peak month for portable heating fires. Only 2% of heating fires in homes involved portable heaters, however, portable heaters are involved in 45% of all fatal home heating fires. An estimated 900 portable heater fires in residential buildings are reported to US fire departments each year and cause 70 deaths, 150 injuries and $53 million in property loss. 52% of home protable heater fires occur because they are too close to items that can burn. For the safety of you and your family, you should take a moment to review these important safety tips.

Space Heater Safety Tips

  • When purchasing an electric space heater, only buy ones that have been evaluated by a nationally recognized laboratory, such as Underwriters Laboratories (UL). Look for the UL mark on the electric heater.
  • Only use heaters that have a thermostat control mechanism and will switch off automatically if the heater falls over.
  • Plug space heaters directly into wall outlets and never into an extension cord or power strip.
  • Always unplug your electric heater when not in use.
  • Inspect the heater’s cord periodically to look for frayed wire or damaged insulation. DO NOT USE a space heater with a damaged cord.
  • Heaters should be placed on a flat, level surace. Do not place heaters on furniture, since they may fall and become damaged or break parts in the heater.
  • Unless the heater is designed for use outdoors or in bathrooms, do not use in damp, wet areas.
  • If you have a liquid-fueled space heater, use only the fuel recommended by the manufacturer. The wrong fuel could burn hotter than the equipment was designed for and cause a serious fire.
  • When refueling, turn off the heater and let it cool down completely before adding fuel. Wipe any spills promptly.
  • Before you buy a kerosene heater, check with your local fire department to ensure that it is legal.
  • If you have a kerosene heater, never fill your heater with gasoline or camp stove fuel, both flare-up easily. Use ONLY crystal clear K-1 kerosene.
  • Use the kerosene heater in a well ventilated room.

Fireplace Safety Tips

  • Make sure to clean out your fireplace frequently and chimneys should be inspected for obstructions and cracks to prevent deadly chimney and roof fires.
  • Check to make sure the damper is open before starting any fire.
  • Never burn trash, paper or green wood in your fireplace.
  • Use a screen heavy enough to stop rolling logs and big enough to cover the entire opening of the fire place, to catch flying sparks.
  • Don’t wear loose-fitting clothes near any open flame.
  • Make sure the fire is completely cool before leaving the house or going to bed.
  • Allow ashes to completely cool before placing them in a tightly covered metal container and keep the ash container at least 10 feet away from your home and any other nearby buildings.
  • Always have a working smoke alarm and a home escape plan. Having a working smoke alarm dramatically increases your chances of surviving a fire. Remember to practice your home escape plan frequently with your family.

Avoid Using These Sources to Heat Your Home

  • Turning on the over and/or stove top(A) Carbon Monoxide (CO) poisoning. CO is an invisible, odorless gas that could be hanging around in your kitchen. The EPA says at modrate levels it causes headaches, dizziness, nausea and fainting. At high levels it can be fatal. (B) The ris for a fire. Leaving your gas or electric stove/oven on poses a risk for fires. Do not use your oven or stove for heat.
  • Running the shower(A) It won’t be very effective, and it will fill your home with unwanted moisture. Moisture can grow into a mold problem. (B) It wastes a lot of water and any benefits are short lived. The lttle, if any, heat that is produced from running your shower will disappear once the hot water runs out. Running your shower for a long period of time is not environmentally friendly and will add an unnecessary increase to your water bill.
  • Burning candles (A) They are not effective. Candles do add some extra warmth to a close surrounding area, but it is certainly not enough to do the trick if the heat is not working in your home. (B) They pose a high risk of fire. Never leave a burning candle unattended.
Featured

Christmas Light Safety

Decorating for the holiday season is always a fun time of year. Creating magic around your home with festive decorations and lights can be time consuming but worth the effort when the task is finished. Whether you use the simple decorations of a tree, wreath and some garlands, or you go all out and turn your home and yard into a winter wonderland, be sure to keep in mind some lighting safety basics.

The National Fire Protection Association (NFPA) statistics show that Christmas lights are responsible for 40% of Christmas tree fires, and overall decorations caused over 15,000 injuries (ladder falls ranked the highest at 34% of these injuries). With these numbers it is important to follow some basic safety protocol and understand how to install and maintain your lights, so you can enjoy the holiday season disaster free. Take a look at the following tips for Christmas light safety.

  • Make sure you’re using the correct lights for the correct area of your home. Don’t use lights labeled for indoor use outside the home. Indoor lights lack the insulation that outdoor lights require to protect them from moisture and weather elements.
  • Inspect the condition of your old light strands to make sure they are still in good condition. If there are frayed, cracked, damaged cords or loose or missing bulbs, toss them out and replace with new strands. This chore can be a pain, but using damaged light strands can create shock and fire hazards. Also, make sure your lights are UL certified. This means they have been tested and meet industry requirements for safety.
  • Consider LED lights if you are looking to replace your lighting strands. They are cooler to the touch, compared to traditional Christmas lights and could help prevent overheating which is the cause of most Christmas tree fires.
  • When linking your light strands together, pay attention to the manufacturer’s instructions for the number of strands to safely link. If you don’t, you run the risk of over taxing your outlets or circuits, leading to electrical malfunction. Electrical issues are the leading cause of Christmas decoration fires.
  • Follow safety procedures when using ladders to decorate your home. Have someone steady the ladder when hanging lights and use awooden or fiberglass ladder to avoid electric shock.
  • Don’t use nails or screws when hanging your lights, as these can damage cords. Use light clips made specifically for the purpose of decorating with lights. Also make sure to secure loose cords and strands to avoid tripping over excess length. The same notion goes for windows and doors, as well. The weight of pressure from a closed window or door on a cord can cause damage that results in electic shock and fire hazards.
  • When decorating with lights outdoors, consider upgrading your outdoor outlets to GFCI (ground fault circuit interrupter). They prevent electric shock when wet conditions arise outside and help protect your home from electrical shorts.
  • When you leave your home or go to sleep for the night, turn off the decorative lights. When lit for long periods of time, they can overheat and cause a fire. Outdoor lights are best put on a timer that can be set for lights to turn on and off with a preset amount of time for illumination.
  • When it’s time to take down the decorations and lights, inspect conditions as you undecorate and take care with how they are stored for the following season. Store them neatly in sealed containers, so they will not be harmed by water or pests. Doing this will help ensure an easier process of decorating next holiday season.

Following just a few simple safety measures can ensure your holiday season can be celebrated safely with your family and friends. You may also save yourself a little time and money in the long run.

Featured

Hazards of Water Damage

The primary goal of water damage restoration is to help you get back to your normal routine by restoring your property to its pre-flooded condition.

The secondary goal of restoration professionals is to minimize these three water damage health hazards:

  1. Mold growth
  2. Bacterial growth
  3. Structural damage

Mold Growth

Where there is moisture, there will be mold. Unfortuantely, if you experience water damage from a flood, the issue of mold is the bigger concern, because there is so much moisture to promote mold growth. Mold is a problem because it can cause illness, and this is the primary reason you want to prevent mold from growing. Exposure to mold can affect many of your body’s systems, including vascular, digestive, respiratory, neurological, skin, urinary, reproductive and immune.

Bacterial Growth

One of the main priorities of a restoration contractor is to determine the category hazard of the water:

  • Category 1 – Clean water – Faucet lines (drinking water)
  • Category 2 – Grey water – Appliances (washing machine)
  • Category 3 – Black water – Sewage (toilet)

This is especially important, because the worst type of water is black water, which can cause some serious health conditions: gastorenteritis, Weil’s Disease (aka Leptospirosis, Hepatitis, acute respiratory illness and tetanus.

The number one rule about water damage is the longer you wait, the worse it will get. This is particularaly true when you are trying to prevent hazardous bacteria from growing. Category 1 water can turn into category 2 water and eventually category 3 water, which is the most toxic and causes many illnesses.

Structural Damage

Water damage can impact the structural integrity of a property because large amounts of water can degrade the strength of the materials. This is particularly true when mold begins to grow, because mold feeds on the material and will continue to feed until it has finished consuming the material. This is the reason wood will rot when mold contaminates it. As the wood is consumed and begins to rot, this will negatively impact the structural integrity of the home, creating a health hazard. Not to mention, rotting wood will reduce the value of the property as well.

Source: What are the Top 3 Water Damage Hazards? – Blog – Mold b Gone

Featured

Asbestos in the Home

Even if asbestos is in your home, this is usually not a serious problem. The mere presence of asbestos in a home or a building is not hazardous. The danger is that asbestos materials may become damaged over time. Damaged asbestos may release asbestos fibers and become a health hazard. The best thing to do with asbestos material in good condition is to leave it alone! Disturbing it may create a health hazard where none existed before. Read this before you have any asbestos material inspected, removed or repaired.

What is Asbestos?

Asbestos is a mineral fiber. It can be positively identified only with a special type of microscope. There are several types of asbestos fibers. In the past, asbestos was added to a variety of products to strengthen them and to provide heat insulation and fire resisitance.

Where Asbestos Hazards May be Found in the Home

  • Some roofing and siding shingles are made of asbestos cement
  • Houses built between 1930 and 1950 may have asbestos insulation
  • Asbestos may be present in textured paint and in patching compounds used on wall and ceiling joints, the use was banned in 1977
  • Artificial ashes and embers sold for use in gas-fired fireplaces may contain asbestos
  • Older products, such as stove-top pads may have some asbestos compounds
  • Wall and floors around wood-burning stoves may be protected with asbestos paper, millboard or cement sheets
  • Asbestos is found in some vinyl floor tiles and the backing on vinyl sheet flooring and adhesives
  • Hot water and steam pipes in older houses may be coated with an asbestos material or covered with an asbestos blanket or tape
  • Oil and coal furnaces and door gaskets may have asbestos insulation

How Can Asbestos Affect My Health?

From studies of people who were exposed to asbestos in factories and shipyards, we know that breathing high levels of asbestos fibers can lead to an increased risk of:

  • Lung cancer
  • Mesothelioma, a cancer of the lining of the chest and the abdominal cavity
  • Asbestiosis, in which the lungs become scarred with fibrous tissue

The risk of lung cancer and mesothelioma increases with the number of fibers inhaled. The risk of lung cancer from inhaling asbestos fibers is also greater if you smoke. People who get asbestosis have usually been exposed to high levels of asbestos for a long time. The symptoms of these diseases do not usually appear until about 20 to 30 years after the first exposure to asbestos.

Many people exposed to small amounts of asbestos, as we all are in our daily lives, do not develop these health problems. However, if disturbed, asbestos material may release asbestos fibers, which can be inhaled into the lungs. The fibers can remain there for a long time, increasing the risk of disease. Asbestos material that would crumble easily if handled, or that has been sawed, scraped or sanded into a powder, is more likely to create a health hazard.

Where Can I Find Asbestos and When Can It be a Problem?

Most products made today do not contain asbestos. Those few products made which still contain asbestos that could be inhaled are required to be labeled as such. However, until the 1970s, many types of building products and insulation materials used in homes contained asbestos. Common products that might have contained asbestos in the past, and conditions which may release fibers, include:

  • Steam pipes, boilers and furnace ducts insulated with an asbestos blanket or asbestos paper tape. These materials may release asbestos fibers if damaged, repaired or removed improperly.
  • Resilient floor tiles (vinyl asbestos, asphalt and rubber), the backing on vinyl sheet flooring, and adhesives used for installing floor tile. Sanding tiles can release fibers. So, may scraping or sanding the backing of sheet flooring during removal.
  • Cement sheet, millboard and paper used as insulation around furnaces and woodburning stoves. Repairing or removing appliances may release asbestos fibers. So may cutting, tearing, sanding, drilling or sawing insulation.
  • Door gaskets in furnaces, wood stoves and coal stoves. Worn seals can release asbestos fibers during use.
  • Soundproofing or decorative material sprayed on walls and ceilings. Loose, crumbly or water damaged material may release fibers. So will sanding, drilling or scraping material.
  • Patching and joint compounds for walls and ceiling, and texture paints. Sanding, scraping or drilling these surfaces may release asbestos.
  • Asbestos cement roofing, shingles and siding. These products are not likely to release asbestos fibers unless sawed, drilled or cut.
  • Artificial ashes and embers sold for use in gas-fired drieplaces. Also, other older household products such as fireproof gloves, stove top pads, ironing board covers and certain hairdryers.
  • Automobile brake pads and linings, clutch facings and gaskets.

Asbestos Professionals: Who Are They and What Can They Do?

Asbestos professionals are trained in handling asbestos material. The type of professional will depend on the type of product and what needs to be done to correct the problem. You may hire a general asbestos contractor, or in some cases, a professional trained to handle specific products containing asbestos.

Asbestos professionals can conduct home inspections, take samples of suspected material, assess its condition, and advise about what corrections are needed and who is qualified to make these corrections. Once again, material in good condition need not be sampled unless it is likely to be disturbed. Professional correction or abatement contractors repair or remove asbestos materials.

Some firms offer combination of testing, assessment and correction. A professional hired to assess the need for corrective action should not relate to an asbestos-correction firm. It is better to use two different firms so there is no conflict of interest. Services vary from one area to another around the country.

The federal government has training courses for asbestos professionals around the country. Some state and local governments also have or require training or certification courses. Ask asbestos professionals to document their completion of federal or state-approved training. Each person peforming work in your home should provide proof of training and licensing in asbestos work, such as completion of EPA approved training. State and local health departments or EPA regional offices may have a listing of licensed professionals in your area.

If you have a problem that requires the services of asbestos professionals, check their credentials carefully. Hire professionals who are trained, experienced, reputable and accredited, aspecially if accreditation is required by state or local laws. Before hiring a professional, ask for references from previous clients. Find out if they were satisfied. Ask whether the professional has handled similar situations. Get cost estimates from several professionals, as the charges for these services can vary.

Though private homes are usually not covered by the asbestos regulations that apply to schools and public buildings, professionals should still use procedures described during federal or state-approved training. Homeowners should be alert to the chance of misleading claims by asbestos consultants and contractors. There have been reports of firms incorrectly claiming that asbestos materials in homes must be replaced. In other cases, firms have encouraged unnecessary removals or performed them improperly. Unnecessary removals are a waste of money. Improper removals may increase the health risks to you and your family. To guard against this, know what services are available and what procedures and precautions are needed to do the job properly.

Source: Asbestos in The Home – US Environmental Protection Agency

Featured

Home Safety Tips

Loss of property, damage to your home, and the sense of loss can be traumatic. The good news is that there are several steps that can be taken to protect your home and your family throughout the year and provide a greater peace of mind when you get away to celebrate.

Here are some home safety tips that will help keep you and your loved ones safe:

  • Create the illusion that someone is at your house if you’re away for an extended period. Leave a TV or stereo on in a room where a burglar would most likely break in. Use exterior lighting and motion detectors to minimize burglar concealment. Make sure your home security yard signs and window decals (if any) are prominently displayed on your property, as they are a good first line of defense to deter potential burglars.
  • Make sure all exterior doors have good proper locks. Install 1 inch deadbolt locks on all exterior doors.
  • If you get an unexpected knock at the door, check to see who it is before opening it.
  • Don’t leave extra keys under doormats, potted plants or any other obvious outdoor location. Thieves will generally find them. Find an inconspicuous place to hide the keys or give a set to a neighbor you can trust.
  • Burlgar proof your glass patio doors by setting a pipe or metal bar in the middle bottom track of the door slide. The pipe should be the same length as the track. Optional home security equipment, such as a glass break sensor can also be used to detect when a glass door or window is shattered and alert you of a break in.
  • Always keep garage doors closed. Even when you’re home, it’s important to safeguard your belongings and your family. By keeping garage doors closed, it prohibits intruders from gaining access to a door that leads directly into your home. Home security system components, such as an overhead garage door contact can also provide added protection to your home.
  • Keep drapes and blinds shut. Especially in rooms where there is expensive equipment. Don’t advrtise the items in your home. By investing in a home security system and following home safety tips like this, you can help protect your investments, even when you’re not there.
  • Store cash, jewelry and other valuables in a safe or safety deposit box instead of leaving them lying around the home. Helping protect your investments and furnishings in yourhome with a security system can help lower your risk of a home invasion or burglary.
  • Don’t leave notes on the door for service people or family memebers when you’re not there. These alert the burglar that you are not home. It’s also important to remember to arm your system every time you leave your house to ensure your home, pets and valuables are safe.
  • Adjust your telephone ring to its lowest volume setting if you’re going to be away from home for a few days. An unanswered phone may tip off a burglar that no one is home. Also, have a neighbor or friend collect your newspaper and mail. Never cancel delivery – you don’t know who will get that information.

Source: ADT Security

Featured

Notorious November Hurricanes

November is not known to produce a high number of hurricane activity, even though it is technically the last month of the Hurricane season. By November, the warm ocean waters have begun to cool at the same time the winds change in the Northern Hemisphere, making the conditions less favorable for tropical development. But you shouldn’t put your emergency kit away just yet.

According to data from NOAA’s Atlantic Oceanographic and Meteorological Laboratory (from 1851 to 2018), 47 hurricanes have formed in November and 5 of those made landfall in the US. September has shown to be the busiest month for hurricanes in the Atlantic (1851 to 2018), with 406 hurricanes to form, and 44 making US landfall since 1950.

Here are some of November’s most infamous hurricanes.

Hurricane Otto – 2016

Though Otto did not impact the US, it did track a horrific path across Central America during Thanksgiving. It is the only known hurricane to cross over Costa Rica into the Eastern Pacific, where it weakened to a named tropical storm for a while. It is responsible for at least 18 deaths in Central America.

It is the latest Caribbean formed hurricane on record and the strongest late season hurricane on record. Otto sustained Cat 3 winds of 115 mph and hit Costa Rica, Columbia, Panama and Nicaragua.

Hurricane Ida – 2009

Ida formed in the Caribbean Sea on November 4th and tracked over Nicaragua on the 5th. Though no deaths were reported, it affected about 6,000 people.

By November 8th, it had re-emerged over the Caribbean, growing into a Cat 1 and Cat 2 as it entered the Gulf of Mexico. Though it weakened to a tropical storm before it made two landfalls in the US (Dauphin Island, AL and Bon Secour, AL), Ida was the second latest hurricane on record to develop so late in the season and make landfall along the northern Gulf Coast.

Hurricane Lenny – 1999

Hurricane Lenny is the strongest November hurricane on record, moving through the Caribbean from November 13th through November 23rd. The hurricane moved over Puerto Rico, Columbia, Saint Croix and the Leeward Islands, sustaining maximum winds of 155 mph at its peak. It was given the nickname ‘Wrong Way Lenny’, due to its unusual path and unfortunately caused major damage and 17 deaths. The name Lenny was retired from rotation, due to the severity of the storm.

Hurricane Mitch – 1998

Hurricane Mitch was a deadly storm (over 9,000 known victims, with another 9,100 still missing post storm) that formed in October but continured its cycle until November 9th, leaving behind staggering destruction.

The hurricane reached Cat 5, producing some of the highest wind speeds on record (177 mph) in the month of November. Mitch left catastrophic economic damage and destruction, stretching from Central America to Florida all the the way to the United Kingdom.

Hurricane Kate – 1985

Kate started out very disorganized and eventually strengthened to a Cat 3 hurricane. It made landfall as a Cat 2 hurricane on Mexico Beach, FL, with 100 mph winds and an 11 feet storm surge on November 21st. Its the strongest storm to hit the US in November and caused millions of dollars in damage.

To read the original article click here.

Featured

7 Reasons You Should Never Hire an Unlicensed Contractor

Being a licensed contractor in Florida is a privilege. Many do not understand the difference in being licensed and unlicensed. Obtaining and keeping your contractor’s license in Florida is expensive and there are requirements you must meet. An unlicensed company is taking the easy and unethical approach to assisting those in need.

Licensed or Unlicensed – Is It a Big Deal?

When you are in need of repairs, questions run through your head: What does it mean to be licensed? Why are some contractors licensed and others are not? Does it really matter?

Being a licensed contractor means they have passed all required testing, met the minimum experience level of four years, passed a credit and background check and they must carry insurance to cover liability and workers compensation.

Risks or Hiring an Unlicensed Contractor

  • No insurance – No liability: An unlicensed contractor is typically uninsured. You may end up being liable for personal or financial injuries to others. If they happen to damage your property, there is no insurance to cover that.
  • Poor qualifications and poor quality work: Unlicensed contractors usually do not have the education or qualifications required of a licensee. Therefor, they may do poor quality work and not finish the project, leaving the homeowner to pick up the pieces.
  • Possible criminal background: Unlicensed contractors also pose the threat for having a lengthy list of criminal history. This list may include violent crime, sexual offenses, substance abuse, fraud and/or theft. Do you wnat someone like that working on your property?
  • Scam artists: Unlicensed contractors often disappear after taking your money. The department cannot discipline an unlicensed person or help you with any recovery of repairs or money lost. These con artists usually try to scam those in need of urgent repairs, such as hurricane damage.
  • Not covered under homeowner’s policy: Most homeowner policies require any repairs be done by a licensed individual.
  • Limited resources for broken contracts: If you have a dispute with a licensed contractor, you have rights and can contact the department who will take disciplinary action. However, this action is not available if the contractor is not licensed.
  • Non compliance with building codes: Most projects require permits and inspections. Unlicensed contractors usually ignore such things. If your project isn’t permitted or doesn’t comply with the building code, you may have to remove or repair the work at your own expense and be subject to fines.

Before you agree to any repairs, confirm the individual is licensed and has insurance. Below are some helpful links for you to use:

Click here to verify a Pinellas County license.

Click here to verify a Florida State license.

To report unlicensed contractors in Pinellas County, click here or call 727-582-6767.

Why Hire a Licensed Contractor?

  • A licensed person has the required education, experience, insurance and qualifications to obtain a license. They must pass a competency examination before practicing.
  • Licensed individuals are screened for prior criminal history.
  • The department can discipline and even revoke a license if the person does not live up to professional standards. This is not a total safeguard, but it is a strong incentive for the licensee to do goo work.
  • You may be able to sue the licensee in civil court for problems related to the work done.
Featured

Steps to Create a Home Inventory Checklist

After a fire, burglary or other event in which you have lost possessions from your home, it may be difficult to remember the details of every one of the belongings that you have accumulated over the years. In this situation, having a current inventory of your possesssions, including make and model numbers, may help you with any potential insurance claims. Taking the time to document your belongings now can help you recover faster after a loss.

Here are some steps you can use to help build your home inventory checklist.

Step 1: Take the time to walk through your property. Compiling a comprehensive home inventory takes time and effort. The more detailed your inventory, the more useful it will be if you must make a claim. Document possessions inside your home and on your property that may be of value.

Step 2: Keep your inventory in a safe place. Creating a digital home inventory and storing it off-site will help ensure that it won’t be lost, stolen or damaged during any disaster at your home. You can also create a photo or video inventory and upload it to a cloud-based service.

  • First, take a picture of relevant rooms or items. Label pictures of rooms and important individual items with a description, including where you bought it and the make, model and serial number. Don’t forget to inventory items that may be out of sight in storage closets or drawers.
  • Second, wlak through your home or office using your phone to shoot video of the contents, describing them as you go.
  • Finally, digital home inventory programs allow you to upload multiple photos of each item, includidng photos of the serial number, receipt and other identifying details. If you choose to create a paper version, consider storing it off site in a safe deposit box.

Step 3: Update your inventory often. When you make a significant purchase, add the information to the inventory while the details are fresh in your mind. This is also a good time to delete items that you have replaced or no longer own.

Step 4: Remember you business assets. While most people thing of their home when making inventory, it is important to document the contents of your business, if applicable, as well.

Step 5: Consider valuable items. Valuable items like jewelry, art and collectibles may have increased in value since you brought them into your home. Check with your agent, if you have one, to make sure that you have adequate insurance coverage for those items, as they may need to be insured separately. Consider putting jewelry or other valuables that you don’t wear or use in a safe deposit box.

Source: 5 Steps to Create a Home Inventory Checklist – Blog – Travelers Insurance

Featured

Exploring Ozone Use in Odor Elimination

We have heard about how the ozone layer in our middle atmosphere protects the earth from harmful ultraviolet rays. Ozone is generated in electrical storms by bolts of lightning – that’s why it smells so fresh during and after a heavy storm. It’s also used in the cleaning and restoration industry. But what exactly is ozone?

Ozone, also known as “heavy oxygen” or “activated oxygen”, is simply a molecule of oxygen consisting of three oxygen atoms (O3) instead of two (O2).

“Normal” oxygen consists of two oxygen atoms bonded together. The bond that holds these two oxygen atoms together is relatively strong, resulting in a stable molecule. However, this bond, although strong, is not unbreakable. When an O2 molecule comes into direct contact with a certain wavelength of ultraviolet (UV) light, or an arc of high voltage electricity, its bond is severed, rendering the two atoms separate, each of which can be referred to as O1.

Oxidation

Oxidation simply refers to the process of an atom of oxygen attaching itself to a receptive molecule, which changes its structure. Oxidation essentially turns something into something else; oftentimes the change is dramatic. One example of oxidation is the transformation of water into hydrogen peroxide. There is one more oxygen atom in hydrogen peroxide (H2O2) than in water (H2O). Hydrogen peroxide is a good example for this article, as we are familiar with its ability to sanitize and disinfect. Its properties are so powerful, in fact, the hydrogen peroxide in bottles at the local pharmacy and grocery store have been diluted to 3%. even at three % dilution, H2O2 is extraordinarily effective at killing bacteria, fungi, viruses and a wide spectrum of germs. By way of comparison, 90% hydrogen peroxide can be used as rocket fuel.

Types of ozone generators

Ultraviolet generators produce ozone in the same way our sun creates and maintains the protective ozone layer between the troposphere and stratosphere. Typically, weaker, and usually less expensive, this type of generator has one or more ultraviolet bulbs mounted inside the unit that emit specific wavelengths of UV light, which separate the atoms of O2 molecules as ambient air is blown past the bulbs by an internal fan. This type of machine normally offers a lower ozone output, and the bulbs weaken over time. They also are prone to breakage, so the bulbs need to be replaced regularly. Corona discharge generators produce ozone with what’s called a “corona discharge tube” or “plate”. Generally offering a stronger and more reliable output than UV generators, corona discharge generators manufacture ozone in the same way lightning does – by ripping the O2 molecules apart with electricity. A high voltage electrical current is passed through a dielectric material (material that transmits electrical force without conduction) in the form of a tube or plate, while ambient air is blown through the tube or over the plate by a fan mounted at the rear of the unit. More powerful, and requiring less maintenance, corona discharge generators are typically the choice for restoration companies and those looking to do the job more effectively and in less time.

Proper operation protocol

Proper procedure calls for the operator to be sure the area is evacuated of humans and animals, and if extremely high levels are to be generated over an extended period, it is wise to remove plants and cover aquariums.

Signs that read “Do Not Enter: Ozone Treatment Area”, should be marked at all entrances. Ozone degrades (turns back into “normal oxygen”) quickly – in about 30 minutes. For this reason, it must be generated on site. (It cannot be kept in tanks) The huge upside to this quick degradation process is that, despite its unparalleled oxidizing/deodorizing/sanitizing capabilities, it leaves absolutely zero residue.

Since the composition of ozone (O3) is merely a third oxygen atom attached to a normal oxygen molecule (O2), the process of reverting back to oxygen is merely a detachment of the third atom from the other two, more strongly bonded atoms. These remaining single oxygen atoms, which don’t join with and alter the molecular composition of odor molecules, rejoin with other single detached oxygen atoms, creating normal O2.

Benefits of offering ozone treatment

If your business offers carpet cleaning, duct cleaning or virtually any cleaning service, ozone treatment can be the best value added service you offer. Cigarette, pet, musty, moldy and cooking odors all can be permanenetly removed quickly and easily with ozone.

Recap the benefits of ozone

  • Ozone is unequaled in its ability to sanitize, disnifect and deodorize
  • When used correctly, ozone can be one of the safest services offered
  • Ozone is completely non-residual, leaving behind only clean, pure oxygen

To read more information, click here.

Featured

Keeping Your Car Mold Free

Hand with microfiber cloth cleaning car.

When people think of mold, most of the time their thoughts turn to homes or other buildings. Older homes that are not well-maintained, basements that have flooded, as well as buildings that have been through natural disasters; all are at risk of having mold. Unfortunately, mold can also be found in many automobiles that are not properly sealed or have had water in them from flooding. Yet, armed with just a few basic items, it’s quite possible to make sure your car does not become one of the many moldy machines on the road.

All mold starts as a stain on fabric or other surfaces, so always be on the lookout. Mold tends to form most often on fabric areas, such as seats, and door panels, so be especially careful of these areas. One of the best ways to prevent mold is to make sure the weather stripping is properly maintained. A good rule of thumb is to conduct an inspection each time you wash your vehicle. If there are any areas where water is leaking into the interior, the windows will begin to fog up and condensation will form on the glass, letting you know you’ve got a problem. Visiting an auto detailing shop can get this problem fixed quickly, often at a reasonable price.

Use Very Little Water

When cleaning the inside of your vehicle, use as little water as possible. Mix a small bowl of water and dish detergent together until it forms a large amount of suds on top, then scoop off the suds and place them in another bowl. Begin by taking a cleaning coth and gently rubbing the suds on the fabric areas. You are cleaning while using practically no water. Keeping the area very dry and at little risk of developing mold.

It’s All About the Rice

A small bag of rice can work wonders to prevent mold. By placing an open sandwich bag that’s full of rice inside a door panel or other spot where it won’t spill, you can prevent mold from forming inside your motor vehicle. Since rice absorbs moisture, it will help prevent mold. Once or twice a year, discard the old rice and replace it with a fresh bag to stay on top of the situation.

Vacuum with Baking Soda

Baking soda is a great item to help prevent moisture, so sprinkling some on the seats and carpet inside your car will help keep mold at bay. After sprinkling the baking soda, let it work its magic for two hours and then vacuum it up. If you live in an area that’s humid, this is a great trick to use throughout the year.

By spending two or three dollars on some supplies, you can make sure your motor vehicle will pass the mold inspection year-round. A few minutes of preventive measures now and then will allow you to have a vehicle that not only looks good inside and out, but is also free of mold and mildew.

Source: Mold, Mildew and More: Keeping Your Car Mold-Free – Brian Reeves – Blog – Mold Blogger

Featured

Water Heater Leaks and Overflows

There is no doubt that hot water heater leaks or overflows will cause extensive damage to your home, but even a water heater pipe dripping or leaking slowly will cause major water damage over time. As the water becomes absorbed into the particle board and swells, it causes the floor to rot and decay. Moreover, the seemingly small water heater overflow leak could lead to water heater flooding and will eventually cause mold in carpeting, as well as permanently stained walls.

Causes of leaks

The life span of most water heaters is about 8-15 years. So, water heater leaks and overflows are just a matter of time for most people. There are different causes for water heater damage and the resulting flooding, so the best and simplest solution is to try and avert extensive water damage in the first place. Proper maintenance of your water heater pipes, water heater overflow pan and water heater overflow valve is extremely important, given the capacity of water heater tank overflows to cause so much water damage. Regular preventative maintenance may ward off water heater leaks and the resulting extensive, expensive repairs.

All water heater pipes and valves must be checked for leaks and drips regularly. Also, make sure to check under the water heater, in case corrosion and rust have eaten away at the bottom of the tank. Continuous water heater leaking into the water heater overflow pan can be caused by corrosion and sediment build up inside the tank. Periodically letting out some water from the spout at the bottom of the water heater should take care of the sediment and minimize corrosion. Prior to performing this procedure, you should turn off your gas or electric power and wait for your water to cool a little. Also, turn off the valve for incoming water and drain water into a bucket or toward the outside of the house.

The temperature/pressure valve on your water heater is a safety feature to release water if the temperature and pressure in the water tank get to be too high. If the valve is not working properly the water heater tank may explod . Since water heater valves may be defective or old and may leak, a regular check could expose any such problem before it gets out of hand and causes water heater overflow valve leaking. As you check the valve, keep in mind that the water in the tank is hot and can cause serious burns. When you pull up or push down on the valve and hot water comes out from the overflow pipe, the valve works as intended.

What to do when you spot a water heater overflow

Sometimes, you’ll be able to spot a water heater overflow at its early stages. If this happens, you can take immediate action and contain the damage before calling for help. These are the basic steps:

  1. Put on protective clothing – Make sure to wear rubber boots, gloves and goggles. If water is gushing out from the water heater, wear a vest or a raincoat for an extra layer of safety.
  2. Survey the area carefully – Make sure that the water on your floor isn’t hot enough to scald you. A room full of steam is a red flag. Make sure there’s good visibility and check carefully for power outlets or electrical wires that may have been submerged to avoid the possibility of getting shocked.
  3. Shut off the water supply – Look for the cold water pipe that feeds water to the heater. It should be the pipe that comes from the main water line and goes to the top of the heating chamber. Look for the valve that controls water flow and turn it clockwise until it won’t twist anymore. Normally, the water supply shuts itself off when the tank is full, but since a leak results in a tank that never fills up, the water will keep on running until it’s manually shut off.
  4. Turn off the heating ASAP – If the water overflow is caused by a malfunctioning thermostat, the water isn’t the only thing you should be concerned about. The heating element will not shut itself down, making it waste energy or even possibly start a fire. As the homeowner, you should know what powers your heater, electricity or natural gas. If your heater runs on electricity, go to your breaker box and flip the switch that feed power to the heater. If you use gas, shut off the gas line that supplies the heater. If you smell the scent of gas, make sure to get everyone out of the house until the air is cleared.
  5. Document the incident – Take photos of the parts of your home and its furnishings that may have been damaged by water. Take notes on what happened as you recall the events. This will be insturmental in filing a successful insurance claim.
  6. Call for professional water damage cleanup services – Water damage can be a nightmare to contend with after a water heater overflow. If done incorrectly, it leaves behind a musty smell and it can permanently damage your home’s structure and the items in it. Bacteria and fungi can also fester and pose a hazard to your home’s inhabitants.

To read the original article click here.

Featured

Don’t Forget Your Pets!

Just like other members of the family, pets need to be part of your disaster plan. If you must evacuate, do you know if pets are allowed where you’re planning to stay? If you’re staying home, what will your pet need if your family must survive with basic necessities after the storm? If you evacuate during a storm make sure the host home, shelter or hotel where you’ll be going accepts your type of pet. Some hotels have emergency policies to take pets in an evacuation. Don’t assume they will always accept your type of pet. Always call in advance to make sure.

Preparation Tips

  • Plan for your pet well in advance if you live in an evacuation area. Write down your plan or create a check list.
  • Take your pet when you evacuate.
  • Know your evacuation route and when you will evacuate.
  • Ask friends or family living outside of evacuation areas if they can keep your pet.
  • Make sure you have a collar and leash for keeping your pet under control.
  • Keep a pet carrier (portable kennel) for each pet – one that allows your pet to stand and turn around. The carrier should be marked with your pet’s identification.
  • Make sure all your pet’s vaccinations are current and have proof available of its current county-issued rabies vaccination.
  • Pack supplies for your pet.
  • If you must use a kennel as a last resort, make sure it is not in an evacuation zone and reserve space as soon as possible. Kennels require proof of vaccinations.

Pet Plan & Supply List

  • Keep current vaccination records.
  • Take a photo of your pet with you.
  • Download your county’s pet identification form, tape it to your pet’s kennel if your pet will be sheltered apart from you.

Things to Pack

  • Identification
  • Immunization records
  • County rabies tag
  • Food & water with bowls (two-week supply)
  • Carrier or portable kennel
  • Muzzle, collar, leash
  • Medications
  • Toys, blanket
  • Cat litter, pan & scoop
  • Plastic waste bags
  • Disinfectant
  • Paper towels

After a storm, stray animals will be collected and taken to temporary collection sites and then transferred to more permanent sites. If you lose your pet, look in the area around your home and call animal services.

Featured

Home Hacks to Withstand the Worst

From hurricanes to tornadoes, to an underestimated amount of rain, sever weather can seriously damage your home.

According to the Insurance Information Institute, Superstorm Sandy caused $18.75 billion in insured property losses, and that’s excluding flood insurance claims covered by the US government. In the last five years floods have affected all 50 states. Around 20% of all flood insurance claims came from low-risk areas. In 2014, the average flood claim was more than $29,000.

When a hurricane or other severe storm results in flooding or structural damage to your home, the results can be catastrophic. But you can avoid many future headaches by making small changes. Here are four household hack to make your home sweet home safer against the next big storm.

Know Your BFE

A key factor in keeping your home safe from flooding is knowing your BFE (Base Flood Elevation). According to Disastersafety.org, that’s the elevation at which your building has a one % chance of flooding annually. You should build your home at at least three feet above BFE to minimize risk. Additionally, make sure your electrical outlets are 12 inches above the BFE to avoid outages during a flood or fire from a short circuit.

Trim Extra Branches

Trees crashing into homes are not uncommon during hurricanes, but you can reduce the risk of this happening to your home. You don’t need to get rid of all the trees on your property, but some maintenance will do the trick. according to Indiana.gov, homeowners should trim branches that are weak or overhanging to reduce the number of limbs that could break and cause property damage.

Be Prepared to Make Shutters

The last thing a homeowner wants to do when a hurricane hits is to have to rush to a home supply store to purchase plywood for emergency shutters. Instead, have materials at home so you’re prepared. Cut the plywood to fit your window, ready a drill and drill bits and be prepared to put those shutters up if needed. The Federal Alliance of Safe Homes has a full set of instructions.

Do Your Homework on Flood Insurance

The most important way to be prepared in case of a flood is to be insured. Many homeowners wait until it’s too late. According to FEMA, most home insurance plans do not cover flood insurance. Plus, flood insurance takes a month to go into effect after the premium has been paid, so get insured pronto!

Source: Weather Safety – Home Hacks to Withstand the Worst – Blog – The Weather Channel

Featured

What to Know About Flood Damage

Flooding is a serious threat. Flood damage can lead to severe damage to property and human life. Houses, cars, commercial establishments, basements are all potential candidates for flood damage. Flooding has an unpredictable nature, reason for more concern if you live in a high risk area. Flooding usually has natural causes. This is common for storms and hurricanes that constantly prey on its path. Water is a force that is hard to stop. However, flood damage can be minimized by being prepared and paying attention to news updates.

Minimizing Flood Damage

Flood damage is at a maximum when you are unprepared or unwilling to take the necessary actions. Elevating electronic equipment, cars and furniture should be the first action during the flooding, but always think of safety before beginning to salvage any property. After the flood, water disposal and drying of soaked materials should minimize damage. Always remember that any water damage requires immediate attention. This is because water damage pregresses with time, requiring attention every time it hits.

Immediate and Seconday Flood Damage

Flood damage may be categorized as immediate and secondary. Immediate flood damage may be best explained as deformed or warped floorboards and walls, unusable electronic equipment, broken furniture and wet documents. Immediate damage can be minimized by turning off water immediately. This can also be done by elevating objects above the flood level or by simply washing out water from surfaces to avoid discoloration, especially for good furniture.

Seconday damage may be considered an after effect. This damage is a result of undisposed water after the flood. The most prominent form would be mold infestation. Mold can be a huge heatlh risk, not to mention the acrid smell it produces. Mold thrives in humid areas where water and moisture exists. Quickly drying materials soaked in the flood will help control secondary flood damage.

Flood Damage: Getting Help

Flood damage can be nulified with the help of professional service providers. Specialization is greatly required with this scale of damage. PRS of Tampa Bay aids in any water or flood restoration projects. A team of experts from PRS has the capability to provide fast restorations. Complete with certifications for mold remediation, water and flood damage control and structural repairs. PRS is a one stop shop.

Flood Damage: Insurance

Always make sure that you are covered with insurance. This is also to say that always contact your insurance provider when flood and water damage is sustained. It is best to know your coverage and to have a cost assessment and restoration appraisals before you barge in with the activities.

Source: 5 Things You Need to Know About Water Damage – Lisa Appel – Blog – Porch

Featured

House Fire Clean Up

ktichen destroyed by fire.

When a disaster like a house fire happens, you may not know what to do next. Who do I call? Where do we go? What do I do now? These questions bay be among the many thoughts running through your mind. Home and business owners may be in shock from the initial devastation. It is important to try and follow the proper steps to achieve a complete fire restoration. Service providers that are associated with the Institute of Inspection Cleaning and Restoration Certification (IICRC) will have the following distinctions: current training, safety and health certification, vast amounts of experience in restoration projects and the proper licenses and insurance information.

The first step in the process is to clean up as much of the existing area as possible. If the area is not immediately cleaned, soot residue and permanent damage can be left behind. If the home or business owner does the initial cleaning it is importnat to follow these steps. When cleaning, always use dust masks and open the area for proper venitilation. Clean from the ceilings to the floors and vacuum all floors and upholstery. Wash any items that can be laundered. Clean the outside with a pressure washer if available.

If immediate clean-up is not done, it can lead to devastating effects. Within minutes of fire and smoke damage, appliances and many items will discolor to a yellow hue. After a few hours, acid will stain bathrooms and many other areas of the home or business. Within days, walls will discolor permanenetly, and items will begin to rust, due to the acid residue. Finally, after weeks the cost of clean up will become substantially more expensive. The building and furnishings can be permanently damaged by the acid left behind. Soot residue will be layered throughout the home or business. For these reasons, it is vital to contact a professional associated with the IICRC, such as PRS of Tampa Bay, to utilize fire restoration techniques to return the home or business to a pre-loss state.

Here are some good fire safety tips to prevent future house fires.

  • Stay at least three feet away from heating equipment, such as the furnace, fireplace, wood stove or space heater.
  • Have a three foot “kid free zone” around open fires.
  • Never use your oven to heat your home.
  • Have a qualified professional install stationary space heating equipment, water heaters and central heating equipment according to local codes and manufacturer’s instructions.
  • Have heating equipment and chimneys cleaned and inspected every year by a qualified professional, as dust, creosote and even small animals can block the flue.
  • Turn off portable heaters when leaving the room and before going to bed.
  • Use the fuel specified by the manufacturer for fuel burning space heaters.
  • Make sure wood fireplaces have a sturdy screen to stop sparks from flying into the room. These screens also help keep small children and pets at a safe distance.
  • When cleaning your fireplace, make sure the ashes are cold before disposing of them into a metal container, a safe distance from your home.
  • As always, test your smoke alarms every month.

Source: https://www/iicrc.org

Featured

A Flood Can Affect Your Health

While a flood event can be dangerous and destructive, the moisture left behind can be harmful , as well. For this reason, it’s important to contact a water restoration company right away if you need emergency extraction. The water is not only harmful for your house, but for your own health.

Bacterical Infections

When water floods your home, it is essential for you to realize that the water is not sterile and is likely to contain harmful bacterial organisms. For this reason, if you have any cuts or scratches, then it is important to protect them from contact with the flood water. To avoid becoming infected with any range of bacterial infections that can be acquired from flood water, immediately clean and disinfect any wound that you sustain in a flooded area, and seek medical attention if you develop a fever or if the wound becomes painful and swollen.

Mosquito-Borne Diseases

Following a flood, the moisture left behind often creates an ideal breeding ground for mosquitoes. These blood-sucking insects can infect people with a number of diseases, so controlling their population is important in these situations. Walk around your property and dump out any containers that hold even a few ounces of water. Also, speak with your neighbors and encourage them to do the same.

Mold Growth

Finally, one of the most common problems seen by water cleanup companies following a house flood is mold. Like most types of fungi, mold thrives in environments that have little airflow and abundant moisture. Because of this, a few mold spores can quickly grow into a significant problem if you have home or basement water damage. When left untreated, mold can affect the value of your home and damage your belongings. More importantly, mold can have a significant impact on the health of your family and lead to wheezing, eye irritation, coughing or more severe symptoms. For this reason, removing any excess moisture from your home after a flood should be considered essential for protecting the health of your family.

Source: Mold After Flooding Could Pose Health Risk, Cause Respiratory Symptoms – Blog post – The Huffington Post

Featured

Mediation For Denied Insurance Claims

Three hands holding pink, yellow & blue puzzle pieces with text "talk, listen, resolve.

A new rule has been put in place by the State of Florida Chief Financial Officer, that expedites the fair and timely handling of residential property insurance claims. The new rule allows you (the insured) the right to take part in a mediation forum with your insurer, to negotiate any dispute you have with your insurer about your claim. The date of notice gives the parties 21 days to work out the issue before arbitration can be scheduled.

Mediation is the practice of a neutral third party helping negotiate an outcome that is amenable to both parties involved. Mediation is non-binding, meaning there is no legal requirement to accept the results. The mediation program was created by the Florida Department of Financial Services (FDFS) to facilitate contested residential property damage claims over $500, precluding the deductible.

A non-partisan mediator, who will be selected by the FDFS, will oversee the meeting. The mediator may be removed at any time, by either party, with good cause. This good cause can be a conflict of interest sited by either party, incompetence in handling the arbitration, or other reasons that could undermine the fairness of the meeting. Mediation takes place in a neutral location determined by the mediator.

For more information regarding insurance claims handling and mediation:

Department of Financial Services

Mediation Section

Bureau of Education, Advocacy and Research

200 East Gaines Street

Tallahassee, FL 32399-4212

Phone: (877) 693-5236 Fax: (850) 488-6372

Featured

Protecting Your Home Against A Hurricane

Anytime a hurricane approaches the coast you’re likely to see scenes of people wasting their time and energy “preparing” for the storm. In fact, you might have seen these images so often that you think the folks shown are doing the correct thing.

If a hurricane is approaching, forget about:

  • Rushing to a building supply store to buy plywood for your windows
  • Taping up your windows

If your house is in danger of being hit by a hurricane, protecting windows and sliding glass doors is almost always the number one thing you can do to ensure you’ll have a livable house if the worst happens. But, if you wait until a hurricane watch is posted, you are almost surely too late.

man on ladder taping a window with blue tape for a storm

Taping up windows is a waste of time, because tape isn’t going to keep your neighbor’s garbage can – which he should have stashed in a place where the wind can’t grab it – from breaking your window when a 100 mph wind flings it at your house. True, the tape just might keep the glass from flying around the room when the garbage can hits it, but an important rule for any windstorm is to not be in a room with windows that can be broken. If your house doesn’t have a windowless room, you should at least do something like cowering behind an overturned table or a heavy sofa in case glass starts flying. If you waste time taping your windows, about the best you can hope for is that the storm will miss your house and the tape won’t be too hard to remove.

Two men, one on a ladder - the other on the ground, hanging plywood panel on a window for a storm.

While tape doesn’t do much, heavy plywood or metal shutters are vital. But you can’t wait until a storm is bearing down to go buy the plywood, because by then it’s probably too late. This is because the plywood must fit the windows and it must be firmly attached to the surrounding walls. Experts recommend using 3/4 inch plywood and drilling screw holes 18 inches apart all around it. Are you going to have time to do this after a watch is posted? This is the kind of thing that should be done well ahead of time, so the window covers will be stored with screws started, and everything you’ll need to install them, such as a ladder and the correct size screw driver handy. The big question you must answer ahead of time is: Who’s going to install the plywood covers, maybe with 20 mph wind gusting to 30 mph, as a storm approaches? It’s probably a sure bet it’s not going to be your 70 year old mother, by herself.

Why is protecting windows so important?

Once a window is broken, the wind blows inside , to not only wreck the interior, but also to apply upward pressure on the roof, which might be enough to send it flying. If this happens, the walls will collapse, and your house is gone. Protection can include impact-resistant glass or other permanent materials that have passed the state of Florida or Miami-Dade County (FL) impact standards tests, sturdy shutters or pieces of marine plywood, marked and cut to fit each window and glass door.

Illustration of preparing a house for hurricane with text: trim weal and dead tree branches, drill holes in plywood for screws 18 inches apart & if you don't have hurricane shutters, 1/2 inch marine plywood should be cut to fit windows.

Here are some other things you should do before a tropical storm or hurricane watch or warning is posted:

  • Remove weak and dead trees or tree limbs on your property.
  • Know whether your home is in a zone that could be flooded by storm surge, meaning you have to evacuate.
  • Have plans for where you will go if you evacuate, when you will leave (maybe early to avoid traffic jams), and how family members will contact each other.
  • If you might have to evacuate, have a”go bag” ready with important papers, such as your homeowner’s insurance policy and prescription drugs.
  • If you live outside possible storm surge zones, and your house is sturdy, you should plan on riding out the storm in a “safe room” inside the house.
  • Have an evacuation or survival kit ready with nonperishable food, water, a first aid kit and other things you’ll need.
  • Have a battery-powered radio, maybe a battery-powered television set for keeping up with the latest advisories.

After a watch is posted, you should have done all the things listed above. You should stay tuned to forecasts and possible warnings. If you are in an area that could be flooded, you should be ready to evacuate. Of course, if you live in a mobile home or a house that isn’t sturdy enough to stand up to the wind, you should evacuate early and avoid the rush.

Source: Protect Your Home Against a Hurricane, Without Wasting Time – blog post – Jack Williams – USA Today, June 2, 2005.

Featured

Dryer Lint Danger

(text) Lint is the most dangerous & highly flammable item in your home! 
three images below text show house on fire, firemen spraying burning house & a dryer that has been burned out.
Photo courtesy of Ductsunlimited.cahttp://www.ductsunlimited.ca/uploads/8/7/3/9/87390002/published/downloadsfadag.jpg?1485902104

Did you know that by not cleaning your dryer exhaust vent you run the risk of destroying your home? Truth! It is the leading cause of dryer fires. According to the National Fire Protection Agency survey. Americans experienced upwards of 16,000 dryer fires between 2010 – 2014. Lint accumulates in dryer vents and ducts and it is highly flammable. Dryer vents should be inspected and cleaned annually. If your household does a lot of laundry, they should be cleaned at least three times a year.

Tips to look for when it’s time for a cleaning:

  • Clothes take longer to dry
  • The dryer’s external cabinet is hotter than normal to the touch

How to Inspect & Clean:

  1. Check the outside vents for obstructions – nest, lint build up and debris left by animal life.

2. Clean the lint screen following every cycle. Use a long flexible brush to clean down inside the body of the dryer. An air compressor may blow the lint out or a combo vacuum cleaner with a brush attachment if the hose is long enough. It is important to remove the lint from the entire length of the vent.

3. Remove dust from behind the dryer, as well as the floor, including the space beneath the dryer and the back of the dryer itself. The air intake comes from the back of the dryer, so any dust left back there will be pulled into the dryer causing more lint to build up.

4. Don’t forget to clean out or replace the duct work leading from the dryer to the outside vent. It is suggested to use a folded, semi-rigid metal duct in lieu of foil ducts, because it supports the highest air flow. Never use white vinyl or plastic ducts as dryer vents.

It’s an even better idea to have your dryer vents inspected and cleaned by a professional occasionally. A professional can ensure that your vent & duct work is cleaned thoroughly and make sure your venting system is working at its best.

Featured

Protect Yourself from Storm Repair Scams

We are two months into the six month hurricane season and – knock on wood – we’ve had uneventful storms, despite the recent passing of the sixth named storm. That being said, September tends to be the busiest and most dangerous month for hurricane season, so we can’t let down our guards. Forecasters have raised the number of named storms from 19 to 20 for the 2020 season and we still have a long way to go before the end of November. We will eventually face a hurricane somewhere along the eastern or gulf coasts.

So, while we continue to prepare and wait, take time to think about how you will approach clean up and repairs after a storm. When a storm passes through, it can leave a mess behind, as well as repairs that need to be performed on your home. Don’t be taken in by repair scams because they can leave you out of money and still in need of repairs. Learn how to recognize common red flags of fraudulent contractors, so you can avoid home repair scams. Here are some possible signs of a scam contractor:

  • Door-to-door solicitations
  • Hesitant to give quotes or estimates in writing
  • States they have materials left over from a finished job in the neighborhood
  • Accepts only cash or asks you to pay the job upfront before work begins
  • Wants you to apply for the building permits
  • Urges an immediate decision
  • Offers guarantees that are too good to be true
  • Asks/demands you to finance work through their own lender
  • Displays no local business phone number & is slow to provide license/insurance documentation

A reputable contractor is required to display their license numbers(s) and local business phone number on their business cards, vehicles, contracts and any other business related materials. If they do not have a local phone number or only an 800 number, they are most likely “storm chasers” and are not licensed to work in your area. Don’t take their work for it if they say “look me up on Sunbiz”. That will only show that they have created a business name, it does not mean they are a legitimately licensed and insured contractor. An accredited contractor will gladly provide copies of licenses and proof of liability/workers comp insurance documentation. It is also reasonable to verify those licenses with DBPR (in Florida) or your county/state licensing boards. Here are some suggestions to follow when determining which contractor to work with:

  • Get endorsements from family, neighbors, friends or your insurance agent.
  • Obtain estimates, for the exact job specifics, from several contractors, in writing. find out what their estimation costs are, before asking them to do an estimate of the work.
  • Do comparisons of at least three contractors and verify that they are all licensed and insured. These are generally able to be checked online. In Florida, you can verify licenses through DBPR.
  • See if there are complaints filed against any contractors you have in mind. This can be checked through the BBB or DBPR.
  • Request copies of your chosen contractors Certificates of Insurance (COI) for general liability and worker’s comp, as well as their state and county licenses. Make sure you ask for references from previous jobs in your area and follow up with them.
  • Get a written contract that includes the following: start/finish dates, oral promises made by contractor (warranties, guarantees), cost of materials, labor, fees and a payment schedule.
  • Review and understand the contract before signing. Ask for clarification for things you don’t understand and do not be pushed into signing if anything makes you wary. NEVER pay for the entire job upfront and don’t necessarily choose the lowest bid – it may end up costing you quality of work and more money in the long run.
  • Before you sign, have a friend look over the contract with you to see if there is anything you missed.
  • Once you and the contractor have signed the contract – get a copy. Also, obtain a lien waiver before work is started. It basically states that workers and material suppliers will not ask for money after the contractor has been paid. Do not sign a consent of owner statement, as this will make you liable to cover the costs of labor and materials that the contractor neglects to pay.
  • It is customary to pay a deposit of the total amount before work commences. Do not pay the final payment on the contract until work is complete and you are satisfied with the job – don’t pay for work that is unfinished or unacceptable. Payments should only be made by check or credit card – NEVER pay cash or sign over your insurance check.

The best way to protect yourself is to always confirm licenses and insurance, get trusted recommendations, and go with your gut. Don’t be bullied or pushed into a quick decision – there are many options and reputable contractors that understand the financial decisions that go into repairing damage to your biggest life investment. Local contractors with proven track records are the way to go.

Sources: Twyla Sketchley – Avoiding Hurricane Repair Scams – Blog post 7/17/16 & How to Protect Yourself from Insurance & Repair Scams After a Hurricane – Blog post 7/25/18

Featured

The Dangers Of Lightning

Photo by Pixabay on Pexels.com

What is lightning?

Lightning is the flash of light produced by a discharge of atmospheric electricity that occurs within clouds, between clouds or between clouds and the ground. The spark can reach over five miles (eight km) in length, raise the temperature of the air by as much as 50,000 degrees Fahrenheit (27,200 degrees C), and contain a hundred million electrical bolts. The rapid expansion of heated air causes the thunder. Since light travels faster than sound, the thunder is heard after the lightning. If you see successive strokes of lightning in the same place on the horizon, then you are in line with the storm, an it may moving toward you.

Facts & Statistics

More than 200,000 lightning damage claims are filed each year with insurance companies. One out of every 200 homes get struck by lightning each year. Lightning starts about 4,400 house fires each year. A bolt of lightning can reach temperatures up to 50,000 degrees, which is 5x hotter than the surface of the sun. The chances of becoming a lightning victim in the US in any one year is 1 in 700,000. Lightning can cause cardiac arrest or even death. Injuries from lightning range from severe burns and permanent brain damage to memory loss and personality change. About 10% of lightning-strike victims are killed, and 70% suffer serious long-term effects. About 400 people survive lightning strikes in the US each year. Lightning is not confined to thunderstorms. It’s been seen in large hurricanes, extremely intense forest fires, volcanic eruptions, surface nuclear detonations and in heavy snowstorms.

Safety Tips

  • Lightning rods can help protect a building from catching fire, although they are not 100 percent effective. They do not protect against power surges.
  • Do not use a landline telephone, electrical wires may be hit by lightning. even using a cell phone is hazardous because the metal parts can conduct lightning. Most people hurt by lightning while inside their homes are on the telephone.
  • A automobile with a metal top can offer you some protection – but keep your hands from the metal sides.
  • Victims of lightning do not retain the charge and are not “electrified”. It is safe to help them.
  • Stay away from windows and doors and stay off porches.
  • Do not lie on concrete floors and do not lean against concrete walls.
  • If outdoors do not stand underneath or near a tree.
  • Whether inside or outside, do not be in or near a water source.

Lightning can enter your home in three main ways:

  1. A direct strike
  2. Through wires or pipes that extend outside the structure
  3. The ground

Once the lightning has entered your home, it can travel through the electrical, phone, plumbing and radio or television reception systems. Lightning can ruin the electrical system in your home and it can also cause a fire. The fire could very well start within the walls, so you may not notice it until it’s too late. You should call 911 immediately after your home is struck by lightning. The fire department handles all lightning calls and they are equipped with thermal imaging cameras to locate a possible fire burning in your home. They also will be able to survey the damages and let you and your family know when it is deemed safe to enter again.

What if lightning strikes your home?

After you have gotten everyone out safely and the fire department has assessed your home, you may be left with damages. A standard home owner’s insurance policy should cover damages caused by lightning, including fires and fried electronics. Below are some tips you can use that will help you get your home back in order:

  • Keep detailed records of all big-ticket purchases, such as TVs, laptops and other expensive electronics. The insurance company will want to see proof of ownership.
  • Report a lightning strike to your agent as soon as possible.
  • Check with your claim representative before you discard any items you plan to claim as damaged.
  • Keep accurate records of how much you spend repairing or replacing items.
  • Review your policy for specific coverage information.

Lightning’s destruction can be random. In some instances, your computer could be fried but your TV still works. You should check all electrical equipment that was plugged in during the time when the lightning struck for damage. If lightning causes fire in your home, you will need a professional to restore your home. Call PRS at 727-NO-WATER. They have technology and experience and they are available 24/7. PRS is equipped to handle fire and smoke damage, as well as any other disaster your home may encounter.

Source: Larry West – “Why is Lightning Dangerous?” Web blog post. Environmental Events – Dec. 2016.

Featured

Before & After A Major Storm

Photo by Suparerg Suksai on Pexels.com

Early Preparation & Supplies

Hurricane and tropical storm safety should be taken seriously from the very beginning of a hurricane season, to ensure that your family and property are prepared. It is important to know the evacuation routes in your area in case you must evacuate, especially if your home is near the coast. You should also have your home inspected to ensure that it meets code to handle the strong winds associated with a hurricane. Perhaps the most important preparation for hurricane season is putting together a supply kit, so you and your family have everything you need to make it through the storm. A storm supply kit should include the following:

  • Non-perishable foods, such as soups, cereal and dry goods, as well as a manual can opener
  • Blankets, pillows and sleeping bags
  • Flashlights, NOAA radio and batteries
  • Gallons of water
  • Toiletries, such as toilet paper, toothbrushes, shampoo, etc.
  • Family prescriptions and first aid kit
  • Important documents, such as passports, insurance policies, Social Security cards, credit cards, cash, etc.
  • Tools

What To Do After A Storm

The storm has passed. Now what?

  • When power returns to your home, turn your major appliances on gradually to reduce damage to sensitive equipment.
  • Avoid downed, damaged or loose power lines and report them immediately to the local police and fire department, as well as to the local utility service provider in your area.
  • Do not use electrical or gas appliances that have been wet, and do not turn on damaged appliances, because of the hazards of electric shock or fire.
  • Even if you have ventilation, never use a generator indoors. This includes garages and crawlspaces. Exhaust fumes contain high levels of carbon monoxide, which can be deadly if inhaled. Even when used outside, keep generators away from doors and windows and at least 10 feet away from your home. Also, allow your generator time to cool down before refilling it with gas – splashing gas on hot generator exponents can lead to a fire.
  • Never use charcoal indoors, because burning charcoal produces high levels of carbon monoxide that can reach lethal levels in enclosed spaces.
photo credit: Tampa Bay Times – Aftermath of Hurricane Michael in the Florida panhandle

Aftermath & Returning Home

If you spent the storm taking shelter in your home, you should remain inside until the storm has passed completely. If your family was forced to evacuate, make sure the municipal government has deemed it safe to return, as floods, mudslides, downed power lines, property damage and other resulting disasters can continue to make the area dangerous after the storm. It is just as important to exercise safety precautions in the aftermath of a hurricane as it is during the storm and it may take a while for your home or area to return to normal. In the meantime, try to stay safe in your home and use your emergency supplies if necessary.

Hurricanes vary widely in strength and have the potential to cause all types of problems, from damage to your home to widespread flooding and destruction that can disrupt entire communities. Following these safety tips will help you keep your family and your property safe in the event of a hurricane. If you experience significant property damage as a result of a hurricane, make sure you call PRS of Tampa Bay immediately to help repair the damage. These professionals will stabilize your home or building to prevent further damage and repair your home quickly, so you can resume your normal life.

Further Damage

Unless you take preventive measures immediately after a disaster, the excessive moisture will continue to damage your household items and materials. With time, the damage will spread throughout your entire property and become irreversible.

You should also keep in mind that rain, high winds or other unfavorable weather conditions may easily inflict further damage to your home or commercial property if it has already been compromised by a disaster (broken roof, missing doors or windows, cracked walls, etc.) and left unattended. So, you are strongly advised to clear the damage as soon as possible after an emergency and protect your home against the mercurial moods of mother nature and other misfortunes.

Click here for more invaluable information on how to prepare for hurricanes and other inclement weather.

https://www.facebook.com/ProfessionalRestorationServicesOfTampaBayInc/

https://www.instagram.com/prs24hr

Featured

How To Prepare An Emergency Kit

Photo by Suzy Hazelwood on Pexels.com

We are three weeks into hurricane season 2020 and though we started the season with record activity, it has been quite calm over the last few weeks. The fourth named storm, Dolly, was fortunately very weak. But we shouldn’t be lulled into complacency over this brief respite of tropical storm activity, remember September is when hurricane season reaches its peak.

It is more crucial than ever that hurricane preparedness continues to be the focus, particularly with the Corona pandemic still looming over our heads. Preparing the house and getting documents and insurance in order should be at the forefront of any Coastal dwellers mind right now, but don’t forget to build your emergency kit. Don’t get caught up in trying to buy all of your supplies, as we’re staring down the barrel of the cone, prepare early. Here is what to pack in an emergency kit and additional steps to take ahead of a hurricane, according to the Federal Emergency Management Agency. (FEMA)

Emergency kits should combine basic staples (food, water) with supplies reflecting your family’s individual needs, like medications or baby formula.

Water: First and foremost, store at least three gallons of water per person – enough to last each three days. If your think you’ll be cut off longer, add an extra gallon per person per day.

Cash: Banks and ATMs could shut down. Power outages render debit and credit cards useless.

Documents: Keep copies of key documents in a waterproof, easy-to-carry container. These include identification, such as passports and Social Security cards, as well as insurance policies and bank account records.

Medications: Keep a one-week supply of prescription medications, plus any over-the-counter items, like pain relievers and antacids.

Food: Lay in a three-day supply of canned food and dry mixes – nothing that needs refrigeration. Avoid thirst-inducing foods, and remember the dietary needs of those around you, including infants (ready-to-feed formula) and pets. Secure a manual can opener.

Sanitation: Think moist towelettes, garbage bags and diapers. Consider paper goods, such as plates and cups , as well as plastic utensils. The Corona pandemic has also caused the recommendation of adding masks and hand sanitizer to the list.

Backup phone chargers: Portable power banks could prove essential in a power outage. Here is a list of emergency apps to consider adding to your smart phone pre-storm. There are also tips on how to prepare your smart phone and other electronic devices before disasters.

Additional items: Flashlights with spare batteries, blankets, first aid kit and NOAA radios are all recommended.

FEMA offers a printable checklist for all-purpose emergency kits. This can be useful to take to the store as you build your stockpile.

Don’t forget to create a “Go Bag” for each member of your family (including pets) in the event you must evacuate. Pack an easily portable bag containing clothes for several days, as well as water, snacks and some of the items from your emergency kit.

Sources: Josh Hafner, USA TODAY, Hurricane Irma: How to prepare an emergency kit. Web blog post. & Matthew Cappucci, The Washington Post, Saharan dust is suppressing hurricane activity over the Atlantic., Web news post.

Featured

Fire Prevention And Safety

Did you know that if a fire starts in your home, you may have just two minutes to escape? Did you also know that roughly half of home fire deaths result from fires reported between 11 pm and 7 am, when most people are asleep?

The most effective way to protect yourself and your home from fire is to identify and remove fire hazards. Almost 60% of house fire deaths occur in homes with no working smoke alarms. During a home fire, working smoke alarms and a fire escape plan, that has been practiced regularly, can save lives.

Install smoke alarms on every level of your home, inside bedrooms and outside sleeping areas. Test smoke alarms once a month, if they’re not working, change the batteries. Smoke alarms should be replaced every 10 years. Smoke alarms save lives! If there is a fire in your home, smoke spreads fast and your need smoke alarms to give you time to get out. In fact, having a working smoke alarm cuts the chances of dying in a reported fire in half!

Never disable smoke or carbon monoxide alarms. Carbon monoxide alarms are not substitutes for smoke alarms. Install carbon monoxide alarms in central locations on every level of your home and outside sleeping areas. If the carbon monoxide alarm sounds, move quickly to a fresh air location outdoors or by an open window or door.

A few fire safety tips:

  • If a fire occurs in your home, GET OUT, STAY OUT and CALL for help.
  • Install smoke alarms on every level of your home, inside bedrooms and outside sleeping areas.
  • Test smoke alarms once a month, if they’re not working, change the batteries.
  • Talk with all household members about a fire escape plan and practice the plan twice a year.

Ensure that all household members know two ways to escape from every room of your home. After escaping from the home, make sure everyone knows where to meet outside in case of fire. Practice escaping from your home at least twice a year and at different times of the day. Practice waking up to smoke alarms, low crawling and meeting outside. Make sure everyone knows how to call 911. Also, it is important to teach household members to stop, drop and roll if their clothes should catch on fire.

Sources: http://www.redcross.org/prepare/disaster/home-fire. http://www.nfpa.org/safety-information/fire-prevention-week.

Featured

Hidden Places Mold Can Be Found

Photo by Pixabay on Pexels.com

Information about how hidden mold in our homes can make us sick has been well documented by the media and contractors who make a living removing mold from buildings. We all expect that mold might be lurking in the moist and dark places in our homes, such as in basements or crawl spaces. But there are many other places mold could be growing in your house that you might never find out about, unless you do a little exploration. Let’s take a look at some of the places mold spores can thrive, so you know what to look for.

1. Window Sills

We don’t often spend a lot of time examining our window sills, but they are a prime place for mold to start and spread. Window sills are frequently exposed to moisture from condensation, and they only get decent air flow during the summer months if the windows are open. The dirt that accumulates in the grooves of the sills supply valuable food to spores and they can grow quickly.

To prevent mold in your window sills, be sure to wipe down windows when you see a lot of condensation and clean out the window tracks periodically to remove the mold’s food source.

2. Refrigerator Drip Pans

The pans used to collect condensation for our refrigerators are rarely seen, so they are easy to forget about. There is not a lot of air circulation under the fridge in most homes, and what is out of sight is, usually, out of mind. Sometimes, food from spills collects in there as well. This creates a perfect breeding ground for mold spores.

Make a yearly appointment to clean out the drip pan using water and white vinegar. If you notice a lot of mold growth, increase the cleanings to twice per year. Also, use this vinegar and water solution on the flooring below the pan, just in case the mold wants to grow here as well.

3. Wallpaper

Unless you are removing paper from your walls, you are unlikely to know if mold spores are growing behind it. If the paper is older or has peeling edges, it’s possible mold has begun spreading where you can’t see. If you suspect you might have a mold problem, it’s best to just get the paper removed and replaced. If you know for a fact that there is a great deal of mold behind the paper, don’t remove it yourself. Instead, hire a trained professional to get rid of it and sterilize the area. Only a pro will know how to prevent huge amounts of spores from launching into the air when the paper is removed.

If you want to have decorative paper on your walls, treat the surface first with a mold-resistant primer. Use a high-quality paste to adhere the wallpaper, and be sure to remove all the air bubbles from behind it. Do not use wallpaper in moist areas such as bathrooms or basements.

4. Attics

If you have any sort of water leak in your room, chances are good that mold could be growing in your attic. The dust that accumulates in attics paired with little air flow makes a perfect environment for spores to thrive.

Check your attic periodically for mold and make sure there are air vents to aid circulation to the area. If you have any roof leaks, get them repaired immediately. It is best to regularly have your roof inspected to catch any leaks before then cause a serious problem, Especially after a heavy rainstorm or other harsh weather.

5. Air Conditioners

Again, condensation is the culprit here. In addition, the air that AC units suck in from the outside contains dirt and pollen – attractive materials for mold. Machines that sit without use for long periods are likely to contain mold spores.

Prevent mold by running your air conditioner every day, even if it’s just for 10 minutes. If you have a window unit, remove it and store it in a dry place when not in use, if possible. If you know your AC has mold, either remove it from the window or hire a professional to do so and have the interior cleaned carefully. If your whole- house AC has mold, it’s best to call in a professional to clean it.

6. Washing Machines

The popular front-load washing machines may be great for high efficiency, but they are notorious for off odors as a result of mold growth. The gasket around the door is wet all the time when the washer is running and doesn’t get to dry out, because the door is usually clesed when the machine is not in use. This creates the perfect atmosphere for mold to grow. Below are some ways to help prevent or remove mold from your washing machine:

  • Either leave the door open after running a load, to let the gasket dry, or wipe the gasket with a cloth when your washing is finished.
  • If mold already exists in the gasket, kill it with a hot water and vinegar and baking soda solution, followed by a fungicidal spray.
  • Regular use of your washer’s recommended washing machine cleaner on the cleaning cycle, will help prevent growth.
  • Avoid using liquid fabric softeners, as they leave a gummy build up in your washer, which is food for mold.
  • Remove clothes immediately after the wash cycle has finished.

7. Chimneys

Depending how well a chimney is capped off, it might take in a good amount of water from rain and snow. Plus, it’s likely that leaves and other organic materials are entering the space and this all combines to create perfect conditions for mold to grow. The porous surfaces of bricks and mortar only add to the problem.

To prevent mold growth in your chimney, first make sure the top is covered appropriately. Then it’s best to call in a professional chimney cleaner to remove mold and keep your chmney puffing along at it’s best.

8. Carpets and Pads

Moisture from concrete floors or wet crawl spaces can easily make it’s way into your carpet pad and eventually the carpet. If you have pets who occasionally have accidents on the carpet, this can increase the potential for mold pores to grow there. If your carpet starts to smell odd or seems damp, unfortunately it might be too late – mold is probably already growing.

The simplest way to prevent mold growth on carpet or padding – regardless of moisture level – is to keep the carpet clean. Dirt, as we’ve discovered, encourages mold growth. By vacuumming at least once per week and having your carpets cleaned periodically, you can prevent mold spores from blooming in your carpet.

Mold is present in most places and sometimes is can make people sick. If you would like to keep your home a healthy space to inhabit, these places should be monitored for potential problems. Fortunately, solutions are simple to achieve with a little diligence and education on what to look for and how to respond.

Holiday Celebration Safety

Photo by cottonbro on Pexels.com

There is no greater joy during the holidays than gathering with friends and family to celebrate. Entertaining loved ones in your home can be a magical experience for all, whether you have people staying for days or just a cozy holiday party, the events of the season make for wonderful memories. Remember to follow the useful tips below to make sure you’re ready for all the festivities of the season.

The winter season generally brings cold weather, so make sure your home heating system is ready to keep your home comfortable.

  • Have a licensed professional inspect your heating system annually before cold weather arrives.
  • If you use space heaters, follow the user instructions. Ensure they are at least three feet from anything flammable and out of high traffic areas.
  • Never leave space heaters running unattended. Turn them off and unplug them when the room is empty and before going to bed.
  • Don’t leave open flames (fireplaces included) unattended.

Decorating for the holidays makes the season feel even more celebratory, however pay attention to where you place your decorations, as well as using the correct lights to accent them. Electrical problems are one of the leading causes of fire during the holiday season.

  • Ensure your tree placement does not block any exits and remember to water your live tree daily.
  • Keep all decorations three feet away from heat sources, including space heaters and fireplaces.
  • When decorating, keep young children in mind. Ensure all breakables, candles and anything else that could present danger out of reach.
  • Use the correct lights (US rated, indoor, outdoor) for your decorating plans and make sure that they are turned off before leaving the house or going to sleep.
  • Avoid overloading electrical outlets, which can overheat and cause a fire.
  • Watch the placement of electrical cords, so as not to cause trip hazards. Do not run them under furniture or rugs.

When guests stay at your home over the holidays, the home becomes a little more crowded, and it’s important that everyone is aware of what to do in case of a fire. New spaces and added people can throw a wrench into a finely tuned escape plan, so the following tips for fire safety are important.

  • Make sure you have smoke alarms located inside each bedroom, outside sleeping areas and on every level of your home.
  • Test smoke alarms monthly to ensure they are working properly.
  • Make sure your family and all your guests are aware of the fire escape plan and the meeting space outside the home, in case of a fire event.
  • Keep the halls, stairs and doorways lit and free of clutter so that escape is not impeded in the event of a fire emergency.
  • If you have a multiple storied home, consider putting older guests or those with mobility issues on the ground floor.

The holidays seem to be wrapped around food preparation for celebratory dinners, so creating a safe cooking space is of the utmost importance.

  • When preparing meals, stay in the kitchen when anything is on the stove, grilling, or broiling in the oven. Unattended cooking fires are a leading cause of home fires.
  • Have a kid free zone of three feet around any cooking appliance.
  • Keep your clothing close fitting when cooking because loose clothing can catch fire.
  • Make sure that towels, potholders, curtains and any other items that can burn are kept away from hot surfaces.
  • Keep an all prupose fire extinguisher on hand for small fires. Never use water to extinguish a grease fire; remember oil and water do not mix.
  • When using a turkey fryer, never leave it unattended and keep children and animals away from the area.

The holidays are a joyous time to create wonderful memories, so be safe and focus on your loved ones.

Source: NFPA.org – Holiday Entertaining Safety Checklist

Design a site like this with WordPress.com
Get started